

Holiday Gift Guide 2026: Thoughtful Ideas for the Family
Browse our 2026 holiday gift guides for teens, boys, girls, moms and dads, with researched product ideas, clear top picks and practical shopping checks.
As an Amazon Associate I earn from qualifying purchases. We may earn a commission from purchases through the affiliate links below, at no extra cost to you.
2026 holiday edition · Researched October 19, 2026. These are editorial selections based on product information and gift suitability, not hands-on reviews or a bestseller ranking. Check the exact model, seller, current price, stock and delivery estimate on Amazon before ordering.
Holiday shopping can start with one useful question: what does this person enjoy enough to make time for? Our 2026 family gift guides are organized around interests, with six concrete ideas in each and an editorial top pick to help you get started. You can browse teens, boys, girls, moms and dads below. Gifts can cross all of these categories; use them as entry points rather than rules about who should enjoy a particular activity.
Choose a gift guide
Holiday Gifts for Teens 2026: 6 Ideas by Interest
Find holiday gifts for teens who enjoy music, building, puzzles and writing, with six researched picks and practical checks before buying.
Top pick: soundcore Select 4 Go Bluetooth Speaker. Read the guide for who it suits and what to check before buying.
Holiday Gifts for Boys Ages 8–12: 6 Ideas for 2026
Explore six holiday gift ideas for boys ages 8–12 who enjoy building, science, drawing and puzzles, with age guidance and direct Amazon links.
Top pick: LEGO Creator Retro Camera 31147. Read the guide for who it suits and what to check before buying.
Holiday Gifts for Girls Ages 8–12: 6 Ideas for 2026
Find holiday gifts for girls ages 8–12 who enjoy crafts, art, building and logic games, with six researched ideas and practical buying guidance.
Top pick: ThinkFun Gravity Maze. Read the guide for who it suits and what to check before buying.
Holiday Gifts for Mom 2026: 6 Thoughtful, Useful Ideas
Choose a holiday gift for Mom around her interests, from a LEGO flower build to coffee tools, a reusable notebook and everyday favorites.
Top pick: LEGO Botanicals Mini Orchid 10343. Read the guide for who it suits and what to check before buying.
Holiday Gifts for Dad 2026: 6 Practical Ideas by Interest
Browse six practical holiday gifts for Dad, including cast iron, a multi-tool, music, coffee and writing picks, with buying checks and direct links.
Top pick: Lodge 10.25-inch Cast Iron Skillet. Read the guide for who it suits and what to check before buying.
A quick starting point
For a teen who enjoys music, start with the soundcore Select 4 Go Bluetooth speaker. Confirm they have a compatible device and a suitable place to listen. This is our interest-based selection, not a claim that it is the best gift for every teenager.
View the teen guide’s top pick on Amazon (affiliate link)
Shop with a small plan
Write down the recipient’s interests and what they already own.
Set your own total budget before comparing products.
Check the exact size, model, age rating, care requirements and any supplies needed.
Read the current seller, price, delivery estimate and return terms at checkout.
Add a personal note or time together rather than buying extras just to fill a box.
The children’s guides focus on ages 8–12 and include suggested groupings for ages 8–9 and 10–12. Package warnings and individual readiness always take priority. Small components, marbles, circuit kits and craft materials need appropriate adult guidance and storage. The adult multi-tool recommendation belongs in safe adult use and storage only.
What these recommendations mean
We researched the linked product identities and considered their fit for specific interests. We have not personally tested every item. “2026” identifies this holiday edition; it does not mean each product was released this year. We avoid fixed price promises, unverified bestseller labels and guarantees about holiday arrival. Product variants and offers can change, so make one final check on the retailer’s page before purchasing.
Looking for ideas beyond gifts? Explore our small coffee station ideas, pantry label guide and phone product photography tips.
Cover photo: Julia Blumberg / Unsplash, used under the Unsplash License. Gift wrapping is illustrative; the recommended products are not pictured.

Holiday Gifts for Dad 2026: 6 Practical Ideas by Interest
Browse six practical holiday gifts for Dad, including cast iron, a multi-tool, music, coffee and writing picks, with buying checks and direct links.
As an Amazon Associate I earn from qualifying purchases. We may earn a commission from purchases through the affiliate links below, at no extra cost to you.
2026 holiday edition · Researched October 19, 2026. These are editorial selections based on product information and gift suitability, not hands-on reviews or a bestseller ranking. Check the exact model, seller, current price, stock and delivery estimate on Amazon before ordering.
Dad does not need to be a grilling enthusiast or a gadget collector to deserve a useful gift. Start with what he likes: cooking, small repairs, music, writing or a familiar coffee routine. This shortlist gives each interest a concrete option and a reason to skip it. Several everyday items also appear in our mom guide because the right recipient is defined by preference, not by the label on the gift list.
Our top pick for a dad who enjoys cooking
The Lodge 10.25-inch cast iron skillet is our starting point for a cook who wants this size and material. It is not the lightest pan and needs appropriate cleaning, drying and seasoning care. Confirm he wants cast iron before buying it. A recipe you would like to cook together gives the present a purpose beyond another piece of cookware.
View our top pick on Amazon (affiliate link)
Six gift ideas to compare
1. For a cook who likes learning a tool
Lodge 10.25-inch Cast Iron Skillet — The linked Lodge is the 10.25-inch skillet. Check the cookware he already uses and whether this size fills a gap. A small pan is not automatically a replacement for a large family skillet. The handle gets hot, and the weight may matter for anyone who prefers lightweight cookware. Follow Lodge’s instructions rather than treating cast iron like a dishwasher-safe pan.
Shop Lodge 10.25-inch Cast Iron Skillet on Amazon (affiliate link)
2. For an adult who likes small fixes
LEATHERMAN Wingman Multi-Tool — The LEATHERMAN Wingman combines tools including spring-action pliers and scissors. Consider it for an adult who understands safe tool use and will actually carry or store it conveniently. It includes a blade, so think about household storage, workplace rules and travel restrictions. It is not a substitute for the correct full-size tool or a gift for a child.
Shop LEATHERMAN Wingman Multi-Tool on Amazon (affiliate link)
3. For a playlist while working on a hobby
soundcore Select 4 Go Bluetooth Speaker — The soundcore Select 4 Go is a portable Bluetooth speaker, useful when he prefers listening out loud instead of wearing headphones. Ask what he plans to connect and whether a shared listening space makes sense. Avoid buying it simply because it is a gadget; an existing speaker may already do the job he wants.
Shop soundcore Select 4 Go Bluetooth Speaker on Amazon (affiliate link)
4. For a drink he already takes along
Zojirushi SM-SA60BA 20-ounce Mug — Choose the Zojirushi SM-SA60BA 20-ounce mug for a regular drink routine, after checking the capacity and bag space. Read the care and beverage instructions instead of assuming any liquid can go inside. A familiar coffee or tea choice can personalize the gift, while the mug size should reflect what he actually finishes.
Shop Zojirushi SM-SA60BA 20-ounce Mug on Amazon (affiliate link)
5. For sketches, lists and project notes
Rocketbook Core, Letter Size, Black — The black letter-size dotted Rocketbook Core is an option for someone who wants reusable writing pages and will follow the compatible pen instructions. It may be useful for temporary project notes, but it is not a permanent paper archive. Check how he saves important information before suggesting he erase pages he may need later.
Shop Rocketbook Core, Letter Size, Black on Amazon (affiliate link)
6. For the dad who plans his coffee ahead
OXO Brew Compact Cold Brew Coffee Maker — The OXO Brew Compact Cold Brew Coffee Maker is a choice for an existing cold-brew fan who enjoys making concentrate at home. Check the preparation time, space and care requirements before gifting. Follow its recipe and dilute the concentrate as appropriate. If he wants coffee immediately with no planning, this brewing style may not fit.
Shop OXO Brew Compact Cold Brew Coffee Maker on Amazon (affiliate link)
Choose one interest and complete the thought
For a cooking gift, include a recipe and time to make it together. For a notebook, write a note about the ideas you hope he will capture. For a tool, make sure it fits his routines and can be stored safely. You do not have to buy a second item to make the first feel generous. Check the exact variant, seller and delivery estimate before checkout.
Explore the holiday guides
Visit our 2026 holiday gift guide for teens, boys, girls, moms and dads. For a related everyday idea, browse cast iron care or our cold brew guide.
Cover photo: Julia Blumberg / Unsplash, used under the Unsplash License. Gift wrapping is illustrative; the recommended products are not pictured.

Holiday Gifts for Mom 2026: 6 Thoughtful, Useful Ideas
Choose a holiday gift for Mom around her interests, from a LEGO flower build to coffee tools, a reusable notebook and everyday favorites.
As an Amazon Associate I earn from qualifying purchases. We may earn a commission from purchases through the affiliate links below, at no extra cost to you.
2026 holiday edition · Researched October 19, 2026. These are editorial selections based on product information and gift suitability, not hands-on reviews or a bestseller ranking. Check the exact model, seller, current price, stock and delivery estimate on Amazon before ordering.
A thoughtful gift for Mom starts with what she enjoys doing for herself. Household equipment only belongs on the list if she actually wants it. These six options cover a small creative project, a coffee routine, writing, music and cooking. Ask what she would enjoy receiving, and give yourself permission to choose one useful item instead of assembling a large basket of extras.
Our top pick for a mom who likes a quiet creative project
LEGO Botanicals Mini Orchid 10343 offers a building activity followed by a decorative flower display. It is an adult set marked 18+. Choose it for someone who enjoys making things and has a place for the finished model. It is an artificial brick-built orchid, not a live plant, and it still needs a shelf or desk where small pieces will be safe.
View our top pick on Amazon (affiliate link)
Six gift ideas to compare
1. For a creative evening
LEGO Botanicals Mini Orchid 10343 — Mini Orchid is our most gift-like starting point because it can be an activity rather than another daily task. Pair it with time to sit down and build, not a promise that it will provide a particular health benefit. If Mom dislikes construction kits or prefers a clear surface, choose a different interest from this list.
Shop LEGO Botanicals Mini Orchid 10343 on Amazon (affiliate link)
2. For someone who already loves cold brew
OXO Brew Compact Cold Brew Coffee Maker — The OXO Brew Compact Cold Brew Coffee Maker makes sense when cold brew is already part of her routine. It is designed for concentrate, which requires attention to the recipe and dilution before serving. This is a planned brewing process rather than an instant drink. Check the storage space and cleaning instructions before making it a kitchen gift.
Shop OXO Brew Compact Cold Brew Coffee Maker on Amazon (affiliate link)
3. For a familiar drink on the go
Zojirushi SM-SA60BA 20-ounce Mug — The linked Zojirushi SM-SA60BA is the black 20-ounce insulated mug. Match that capacity to how much she normally carries and the space in her bag. Read the manufacturer’s beverage and care guidance, and do not assume that every drink or cleaning method is suitable. Choose her preferred size over the largest option.
Shop Zojirushi SM-SA60BA 20-ounce Mug on Amazon (affiliate link)
4. For a writer who likes reusable pages
Rocketbook Core, Letter Size, Black — Rocketbook Core can suit someone who enjoys handwritten planning and is comfortable erasing pages after saving what matters. The linked version is a black letter-size dotted notebook. Confirm compatible pens and care instructions. If she treasures paper journals as permanent keepsakes, a reusable notebook may be the wrong kind of thoughtful.
Shop Rocketbook Core, Letter Size, Black on Amazon (affiliate link)
5. For playlists in a favorite space
soundcore Select 4 Go Bluetooth Speaker — A soundcore Select 4 Go Bluetooth speaker is an option for someone who likes listening away from a phone’s small speaker. Confirm the device she will connect and whether shared-space listening fits her habits. You can make the gift personal with a playlist you created, while leaving the final music choice to her.
Shop soundcore Select 4 Go Bluetooth Speaker on Amazon (affiliate link)
6. For the mom who has specifically wanted cast iron
Lodge 10.25-inch Cast Iron Skillet — A Lodge 10.25-inch cast iron skillet can be useful for an interested cook, but it brings weight and a care routine. Give it because she wants that cooking tool, not because she handles meals. Check whether she already owns this size. The handle gets hot; appropriate heat protection and the manufacturer’s care instructions matter.
Shop Lodge 10.25-inch Cast Iron Skillet on Amazon (affiliate link)
Finish with something personal
Ask which routine she wants to improve and which tasks she would rather have taken off her plate. A note explaining why a gift reminded you of her is often more meaningful than another accessory. For kitchen gifts, offering to cook and clean up can make the intention clear. Check seller terms, size and duplicates before ordering; the best fit may be something she already named.
Explore the holiday guides
Visit our 2026 holiday gift guide for teens, boys, girls, moms and dads. For a related everyday idea, browse cast iron care or our cold brew guide.
Cover photo: Julia Blumberg / Unsplash, used under the Unsplash License. Gift wrapping is illustrative; the recommended products are not pictured.

Holiday Gifts for Girls Ages 8–12: 6 Ideas for 2026
Find holiday gifts for girls ages 8–12 who enjoy crafts, art, building and logic games, with six researched ideas and practical buying guidance.
As an Amazon Associate I earn from qualifying purchases. We may earn a commission from purchases through the affiliate links below, at no extra cost to you.
2026 holiday edition · Researched October 19, 2026. These are editorial selections based on product information and gift suitability, not hands-on reviews or a bestseller ranking. Check the exact model, seller, current price, stock and delivery estimate on Amazon before ordering.
A good gift can give a girl room to explore an interest instead of telling her what she ought to like. This guide for ages 8–12 combines hands-on crafts, drawing, building and puzzles. These are options for any child with matching interests; the age bands help you plan support, not draw hard boundaries. Several crossover picks also appear in our boys’ guide so you can browse by activity rather than by label.
Our top pick for a girl who enjoys solving things
ThinkFun Gravity Maze is our first choice here for a child who likes figuring out a path and testing whether it works. Its physical marble challenges offer a different kind of activity from a craft kit. It is marked 8+, and the small marbles need careful storage. Choose it for an interested puzzle solver rather than assuming it will appeal to every child.
View our top pick on Amazon (affiliate link)
Six gift ideas to compare
1. Ages 8–9: a puzzle to explore together
ThinkFun Gravity Maze — Make the first Gravity Maze session about understanding the challenge rather than finishing quickly. Ask the child to explain where the marble should go before trying the arrangement. An adult can help read instructions without solving the puzzle. A clear table and a small container for the marbles matter more than extra accessories.
Shop ThinkFun Gravity Maze on Amazon (affiliate link)
2. Ages 8–9: an invitation to draw
Crayola Inspiration Art Case, Space Theme — The Space Theme Crayola Inspiration Art Case is a starting point for a child who enjoys crayons, markers and colored pencils. Pair it with a homemade booklet of drawing prompts: a pet portrait, a pretend shop or a room redesign. It may feel too basic for a practiced artist, so look at the materials they already reach for.
Shop Crayola Inspiration Art Case, Space Theme on Amazon (affiliate link)
3. Ages 8–12: a model for a creative display
LEGO Creator Retro Camera 31147 — LEGO Retro Camera 31147 is marked 8+ and can suit a child interested in building, photography or making a shelf display. The same bricks form alternate builds one at a time. The finished camera is a toy model and cannot take photos. Add a printed family picture beside it to connect the project to a real memory.
Shop LEGO Creator Retro Camera 31147 on Amazon (affiliate link)
4. Ages 8–12: a craft with a planned work space
Klutz Make Your Own Mini Erasers — Klutz Make Your Own Mini Erasers is listed for ages 8–12. It is a specific craft project, so check the full instructions, included materials and any preparation or curing steps before gifting. Plan adult help as directed, protect the work surface and keep materials away from younger children. This suits someone who enjoys small, detailed projects.
Shop Klutz Make Your Own Mini Erasers on Amazon (affiliate link)
5. Ages 10–12: a screen-free challenge corner
ThinkFun Rush Hour — ThinkFun Rush Hour carries an 8+ rating and can appeal to an older child who enjoys gradually working out a solution. The traffic layout gives the puzzle a clear objective: free the red car. It is a solo activity, so choose something else if the recipient mainly wants a group game to play with friends.
Shop ThinkFun Rush Hour on Amazon (affiliate link)
6. Ages 10–12: a science project to investigate
Snap Circuits Jr. SC-100 — Snap Circuits Jr. SC-100 is rated 8+ and offers a structured introduction to circuit projects. It can be a thoughtful pick for an older girl who asks how things work. Follow the included diagrams and power instructions, arrange adult support and check battery needs. Keep a notebook nearby so she can record questions and ideas between projects.
Shop Snap Circuits Jr. SC-100 on Amazon (affiliate link)
Make the activity part of the gift
For ages 8–9, plan a first session with the supplies laid out and time to ask questions. For ages 10–12, give more choice over which project or challenge comes first. Follow each package’s age rating and warnings regardless of these suggested groups. A personal note offering an afternoon together can make a modest gift feel considered without adding more items to the cart.
Explore the holiday guides
Visit our 2026 holiday gift guide for teens, boys, girls, moms and dads. For a related everyday idea, browse cast iron care or our cold brew guide.
Cover photo: Julia Blumberg / Unsplash, used under the Unsplash License. Gift wrapping is illustrative; the recommended products are not pictured.

Holiday Gifts for Boys Ages 8–12: 6 Ideas for 2026
Explore six holiday gift ideas for boys ages 8–12 who enjoy building, science, drawing and puzzles, with age guidance and direct Amazon links.
As an Amazon Associate I earn from qualifying purchases. We may earn a commission from purchases through the affiliate links below, at no extra cost to you.
2026 holiday edition · Researched October 19, 2026. These are editorial selections based on product information and gift suitability, not hands-on reviews or a bestseller ranking. Check the exact model, seller, current price, stock and delivery estimate on Amazon before ordering.
For boys ages 8–12, a gift that matches an existing interest usually has a better chance of being used than a box chosen only because it says “for boys.” These ideas center on building, experimenting and making. They can suit any child with those interests. Some also appear in our girls’ guide because curiosity and creativity are not limited by gender. Choose by readiness, household space and what the child already enjoys.
Our top pick for a builder ages 8–12
The LEGO Creator Retro Camera 31147 gives a child a defined first build and the option to rebuild it into another design. LEGO lists it for ages 8+. It is especially relevant to a child who notices cameras, family videos or the shapes of everyday objects. It is a model camera, not a working camera for taking pictures.
View our top pick on Amazon (affiliate link)
Six gift ideas to compare
1. Ages 8–9: a build with a clear finish
LEGO Creator Retro Camera 31147 — The Retro Camera can work as a holiday-afternoon project with an adult nearby when needed. Leave the instructions accessible instead of rushing to help with every step. Its alternative models reuse the same pieces, so they are built one at a time. A small tray can help keep bricks together during the project.
Shop LEGO Creator Retro Camera 31147 on Amazon (affiliate link)
2. Ages 8–9: supplies for making their own world
Crayola Inspiration Art Case, Space Theme — Crayola’s Space Theme Inspiration Art Case combines crayons, markers and pencils in a carrying case. Although marketed for younger children too, it can suit an 8- or 9-year-old who still loves these materials. Add plain paper and a prompt such as designing a pretend campsite. For an experienced artist, ask whether specialized supplies would be more useful.
Shop Crayola Inspiration Art Case, Space Theme on Amazon (affiliate link)
3. Ages 8–12: an introduction to circuit projects
Snap Circuits Jr. SC-100 — Snap Circuits Jr. SC-100 is marked ages 8+ and uses snap-together electronic components with project instructions. Give it to a child who likes following a diagram and finding out what changes when a part moves. Check the power requirements before wrapping it, follow the manual and plan adult help. It is not a kit for experimenting with household outlets.
Shop Snap Circuits Jr. SC-100 on Amazon (affiliate link)
4. Ages 8–12: a three-dimensional puzzle
ThinkFun Gravity Maze — Gravity Maze asks the player to arrange a path for a marble. It is a fit for a child who enjoys reasoning through a problem rather than simply watching a marble roll. Start with easier challenges and let the child test their own ideas. Keep the small marbles contained, particularly in homes with younger siblings.
Shop ThinkFun Gravity Maze on Amazon (affiliate link)
5. Ages 10–12: a portable-feeling puzzle routine
ThinkFun Rush Hour — Rush Hour is rated 8+, but it also belongs on the shortlist for an older child who likes solo logic challenges. Moving vehicles to free the red car gives each attempt a concrete goal. It requires the pieces and challenge setup, so it is better at a table than loose in the back seat of a moving car.
Shop ThinkFun Rush Hour on Amazon (affiliate link)
6. Ages 10–12: a notebook for repeat planners
Rocketbook Core, Letter Size, Black — Rocketbook Core is a more specific choice for a child already interested in lists, sketches or keeping project notes. The linked notebook is letter-size with dotted pages. Read its compatible pen and erasing instructions together. Choose ordinary paper instead if the child wants to save every original drawing or dislikes wiping pages clean.
Shop Rocketbook Core, Letter Size, Black on Amazon (affiliate link)
A useful age check before checkout
For ages 8–9, prioritize manageable instructions and an adult who can help without taking over. For ages 10–12, ask whether the challenge or materials feel interesting rather than too young. These age groupings are shopping suggestions, not developmental guarantees. Always follow the package age rating and warnings. Check batteries, extra paper, small-part storage and duplicate sets before buying.
Explore the holiday guides
Visit our 2026 holiday gift guide for teens, boys, girls, moms and dads. For a related everyday idea, browse cast iron care or our cold brew guide.
Cover photo: Julia Blumberg / Unsplash, used under the Unsplash License. Gift wrapping is illustrative; the recommended products are not pictured.

Holiday Gifts for Teens 2026: 6 Ideas by Interest
Find holiday gifts for teens who enjoy music, building, puzzles and writing, with six researched picks and practical checks before buying.
As an Amazon Associate I earn from qualifying purchases. We may earn a commission from purchases through the affiliate links below, at no extra cost to you.
2026 holiday edition · Researched October 19, 2026. These are editorial selections based on product information and gift suitability, not hands-on reviews or a bestseller ranking. Check the exact model, seller, current price, stock and delivery estimate on Amazon before ordering.
Teen gifts get easier when you start with how they spend a free afternoon. A music fan, a sketchbook collector and a patient puzzle solver may want completely different things. This shortlist covers those interests without assuming that every teenager needs another screen. Ask what they already own before picking a duplicate, and choose a gift they can use without an unexpected subscription.
Our top pick for a teen who likes music
The soundcore Select 4 Go is our starting point for a teen who wants a separate Bluetooth speaker rather than listening through a phone speaker. Confirm they have a compatible audio source and somewhere they are allowed to play it. It is a shared-space gift, so agree on volume and quiet times before it becomes a bedroom fixture.
View our top pick on Amazon (affiliate link)
Six gift ideas to compare
1. For music and shared playlists
soundcore Select 4 Go Bluetooth Speaker — A portable Bluetooth speaker gives a playlist a purpose beyond scrolling. Pair it with a handwritten invitation to choose music for a family cookout or a room-cleaning session. Skip this choice if headphones are the household preference or the teen already has a speaker they love. This is a speaker, not a replacement for their streaming device.
Shop soundcore Select 4 Go Bluetooth Speaker on Amazon (affiliate link)
2. For handwritten notes and ideas
Rocketbook Core, Letter Size, Black — The Rocketbook Core is worth considering for a teen who enjoys writing but wants reusable pages. The linked version is the black, letter-size dotted notebook. Check the compatible pen and care instructions; this is not ordinary paper to fill with any permanent pen. Ask whether they actually want the erase-and-reuse routine before giving it for school.
Shop Rocketbook Core, Letter Size, Black on Amazon (affiliate link)
3. For a photography fan who likes building
LEGO Creator Retro Camera 31147 — LEGO’s Retro Camera 31147 is a camera-themed building toy rated 8+, so it can also suit an older builder who likes its design. It rebuilds into alternate models using the same bricks. It does not take photographs. Choose it for making and displaying, and consider adding a family photo walk as the personal part of the present.
Shop LEGO Creator Retro Camera 31147 on Amazon (affiliate link)
4. For a patient puzzle solver
ThinkFun Gravity Maze — Gravity Maze is a physical marble logic game rather than an app. Its 8+ age marking is a starting point; enjoyment depends more on whether the teen likes working through a challenge. It makes sense for someone who enjoys testing arrangements and trying again. Small marbles need a designated storage spot away from younger children.
Shop ThinkFun Gravity Maze on Amazon (affiliate link)
5. For the teen who carries a warm drink
Zojirushi SM-SA60BA 20-ounce Mug — The linked Zojirushi is the SM-SA60BA, a 20-ounce insulated mug. Check the size against their bag and bottle pocket, and read the beverage and cleaning instructions before use. Choose this for an existing tea or other suitable drink routine rather than encouraging a new caffeine habit. Very hot drinks still require care even when carried in a mug.
Shop Zojirushi SM-SA60BA 20-ounce Mug on Amazon (affiliate link)
6. For a compact desk break
ThinkFun Rush Hour — ThinkFun Rush Hour is a traffic-jam logic puzzle: the challenge is to slide vehicles so the red car can get out. It is a useful alternative for a teen who likes a clear problem with a finish line. The 8+ label does not mean every older teen will enjoy it, so ask about their interest in solo puzzles first.
Shop ThinkFun Rush Hour on Amazon (affiliate link)
How to choose without guessing
For younger teens, check household rules about Bluetooth devices and hot drinks. For older teens, ask about their work space, commute or favorite hobby. A short conversation is more useful than guessing from an age label. If you are unsure, offer two choices and let them pick. Keep packaging and check the seller’s return terms, especially when buying well ahead of the holiday.
Explore the holiday guides
Visit our 2026 holiday gift guide for teens, boys, girls, moms and dads. For a related everyday idea, browse cast iron care or our cold brew guide.
Cover photo: Julia Blumberg / Unsplash, used under the Unsplash License. Gift wrapping is illustrative; the recommended products are not pictured.

How to Choose a USB-C Cable for Charging and Data
Compare USB-C cable power, data capability, length and device requirements before buying a cable for your phone or laptop.
As an Amazon Associate I earn from qualifying purchases. This article contains affiliate links; we may earn a commission if you buy through them, at no extra cost to you.
Featured stock photograph by Marcus Urbenz / Unsplash. Illustrative image; pictured items are not identified as linked products.
Start with the job, not the connector shape
A USB-C plug describes the connection shape, but it does not tell you everything a cable can do. A cable for charging a phone may serve a different purpose from one used to transfer camera files or connect a display. Write down the intended job before comparing listings.
Check both devices and the charger or accessory involved. Read their manuals for the connection and capability required. Two cables can look similar while supporting different power levels or data rates, so appearance is not a reliable buying guide.
Compare charging power separately from data
For charging, check the device’s requirements, the charger’s output at the port you will use, and the cable’s stated power capability. A high number on the cable does not make a device charge beyond what the connected equipment supports. Multiport chargers may also allocate power differently when several devices are connected.
For data, look for a stated transfer capability that meets the needs of both devices. A cable that charges a laptop is not automatically the right choice for fast external-storage transfers. USB-IF’s cable guidance distinguishes power markings from data-rate markings; they describe different capabilities.
Do not assume display support
If your goal is to connect a monitor, check the computer port, monitor input, cable and any dock together. Confirm the intended display mode, resolution and refresh rate using the makers’ specifications. A USB-C connector at each end does not establish that the complete combination supports video.
For a phone microphone, capture device or other accessory, check that product’s instructions too. Some setups need a specific cable or adapter. Buying by the phrase “USB-C compatible” alone can leave an important requirement unanswered.
Choose a length that fits the real setup
Measure the route from the port to where the device will sit. Allow comfortable slack without leaving a long loop across a walkway. Check any length limits or recommended cable type in the equipment instructions, particularly for high-performance data or display connections.
Consider how the connector will fit with the phone case or a recessed port. A right-angle connector may help in one arrangement and obstruct another. Compare the physical dimensions and orientation rather than relying on a styled product photograph.
Keep a simple record once you find the right cable
Keep the model number or purchase record with the cable’s documented capabilities. Use a small identification tag if several leads look alike, positioned so it does not interfere with the connector or handling. Separate a known data cable from everyday charging leads if that makes your workflow clearer.
Inspect cables for damage and follow the equipment maker’s use and care instructions. Replace damaged leads rather than trying to solve an unreliable connection with increasingly forceful bending. If the setup fails, test one component at a time using the manufacturer’s troubleshooting steps.
A short checkout checklist
Before buying, confirm the two connectors, required charging capability, stated data capability, any display requirement, length and physical fit. Check the exact model and seller rather than assuming every item in a search result has the same specifications.
Buy for the task you need today, with room for a clearly defined future use if that matters to you. A higher headline specification is useful only when the rest of the equipment can use it. This guide is a compatibility checklist, not a hands-on review of every cable linked below.
Compare the options
These affiliate links open Amazon search results, not individual tested-product recommendations. Compare the exact model, seller, dimensions and compatibility before ordering.
Source and further reading
Related guides
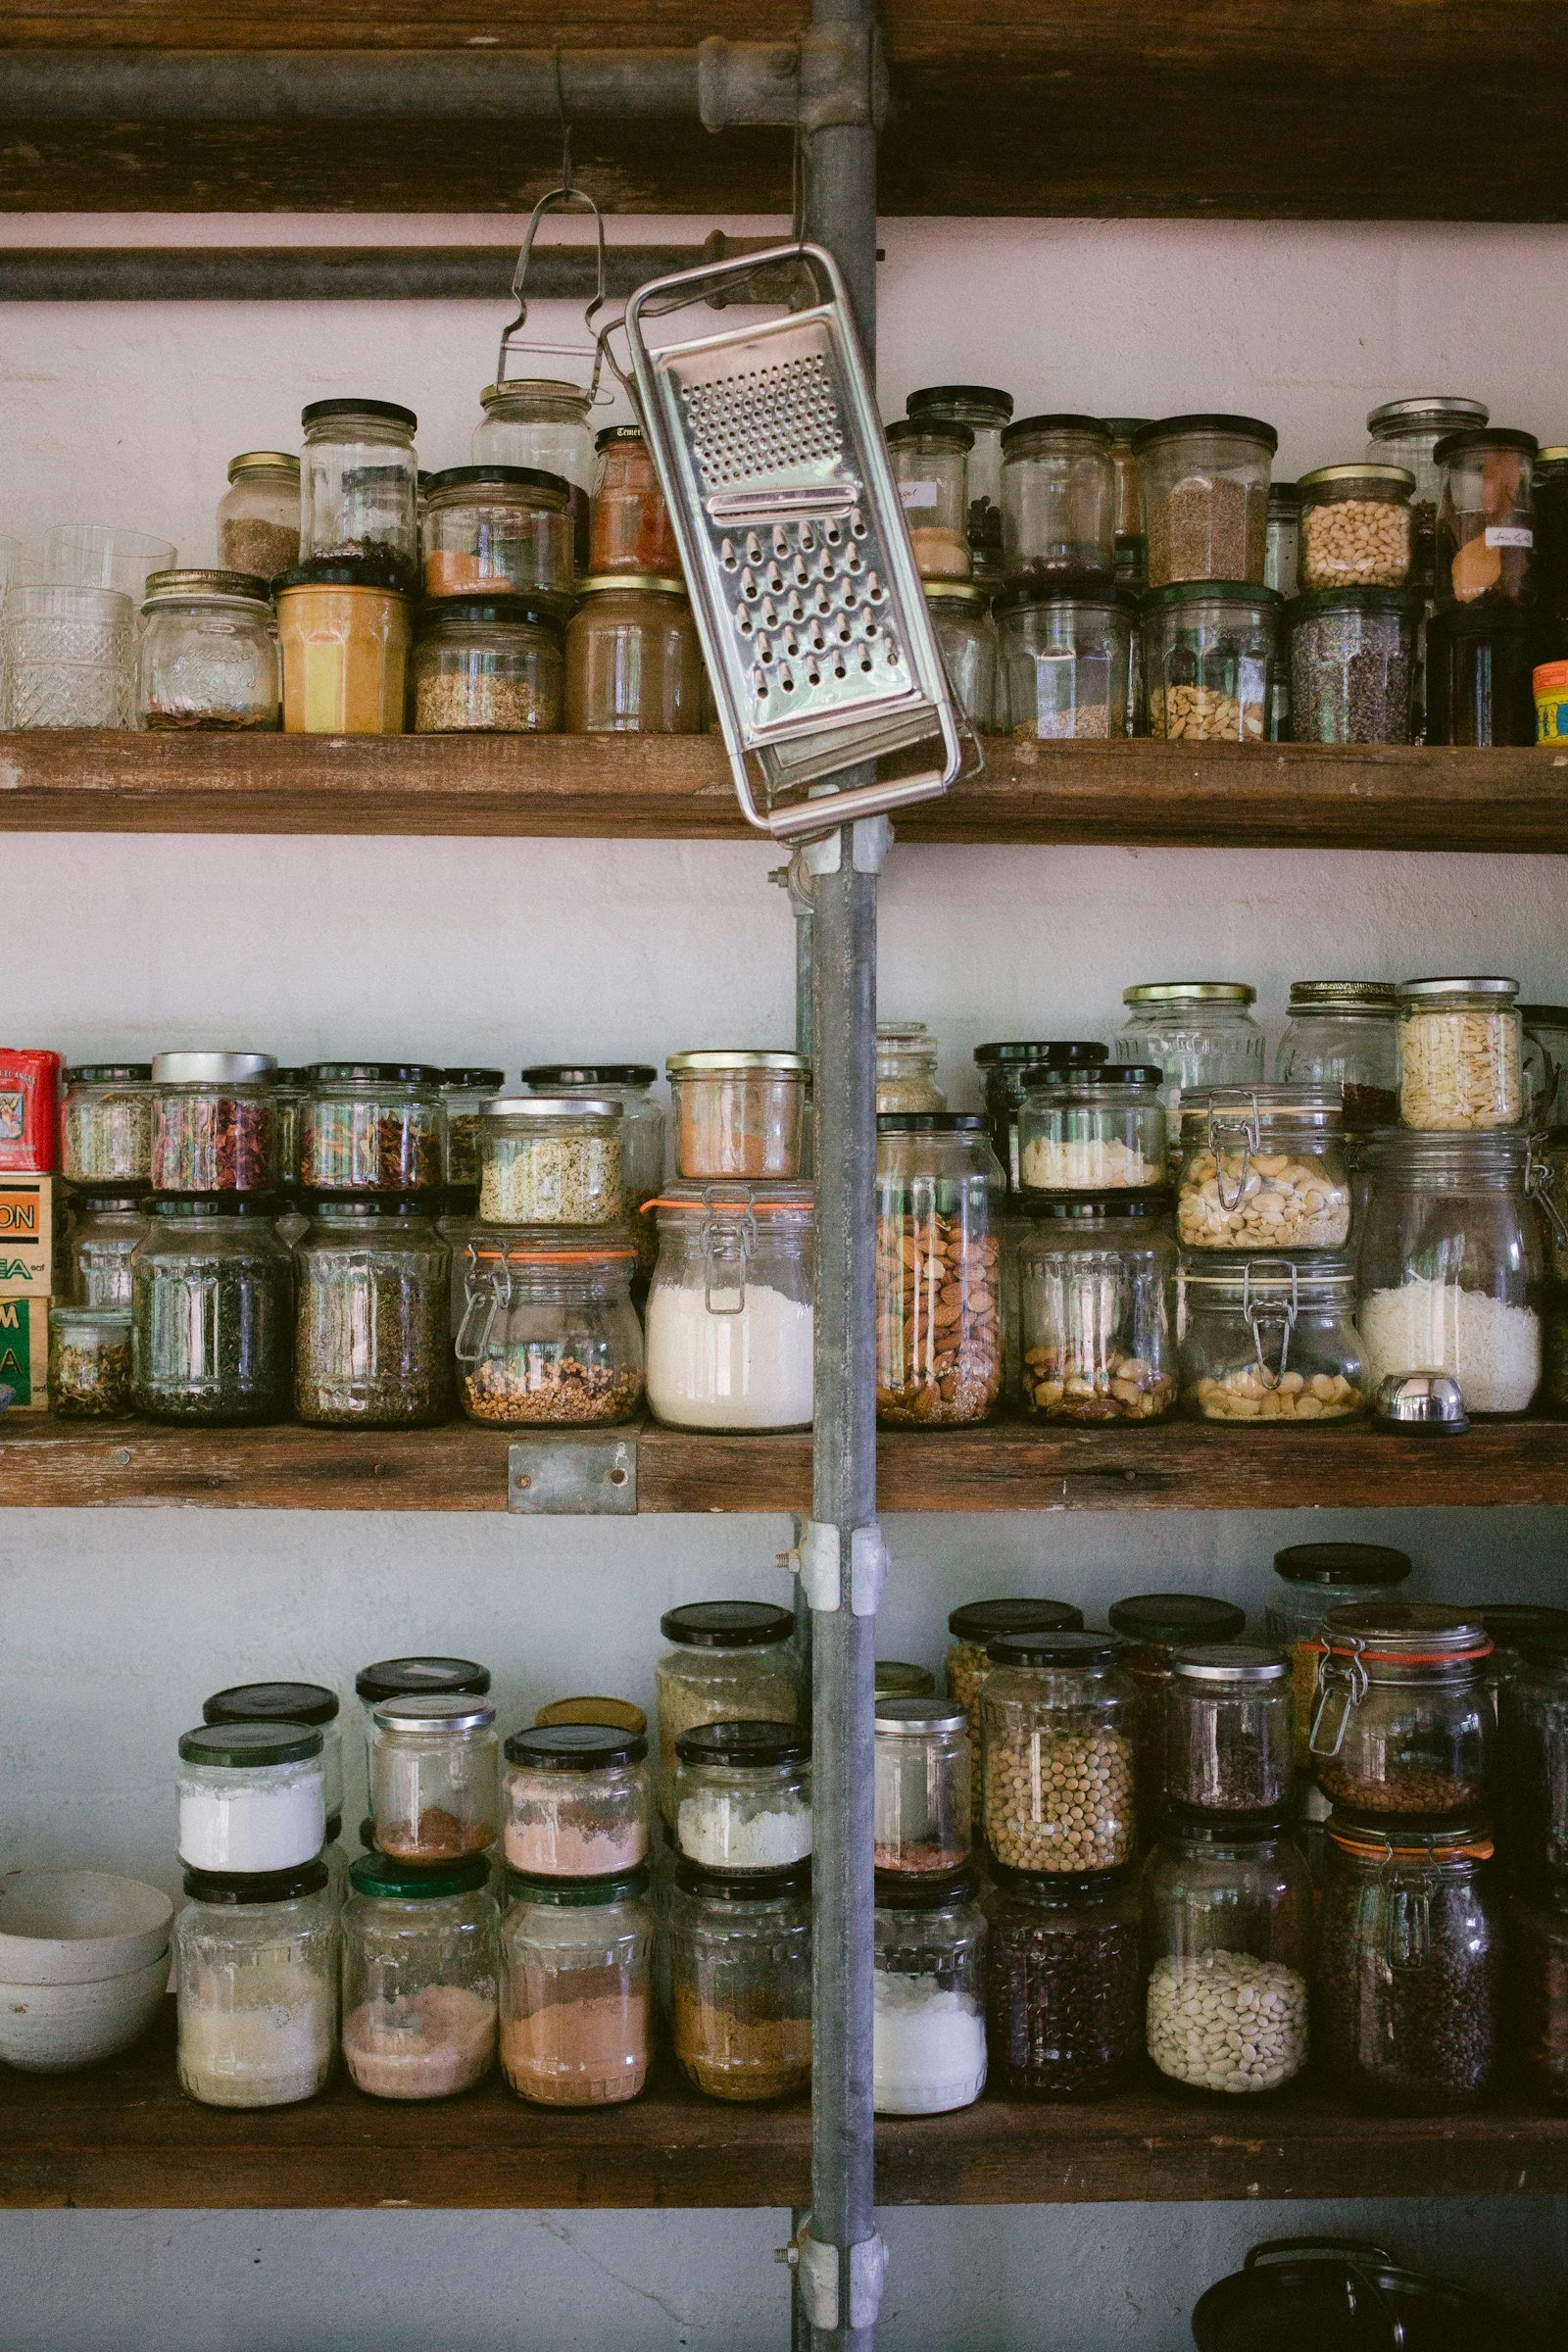
Pantry Label Ideas: A Simple System That Stays Useful
Choose readable pantry labels, separate bin categories from food details, and plan a labeling system that is easy to update.
As an Amazon Associate I earn from qualifying purchases. This article contains affiliate links; we may earn a commission if you buy through them, at no extra cost to you.
Featured stock photograph by Luisa Brimble / Unsplash. Illustrative image; pictured items are not identified as linked products.
Label the decision you want to make easier
Useful pantry labels answer an everyday question: where does this go, what is inside, or what needs using next? Start by noticing which question your household asks most often. A beautiful label that does not help someone find or return an item adds work without solving the problem.
Choose a few shelves or bins for a trial before labeling every container. Keep the wording familiar to your family. “Breakfast” may work better than separate decorative labels for every type of cereal when the contents change every week.
Use categories for bins and specifics for containers
A mixed snack bin needs a category label. A container holding one ingredient needs an accurate contents label. Keeping these jobs separate makes it easier to change groceries without relabeling the entire pantry.
Use broad categories only where they remain useful. “Baking” works for a bin of packaged supplies, but it is not a clear substitute for identifying flour or sugar inside an individual container. Do not rely on appearance to distinguish similar ingredients.
Preserve the information on the original package
A decorative label does not replace the ingredient list, allergen information, preparation directions or storage guidance. Keep the original packaging or a clear record of those details when decanting food. Follow the food manufacturer’s instructions and avoid mixing new contents into an unidentified older batch.
If you add a date, identify what it means. “Opened Oct 19” and a manufacturer’s best-before date are different pieces of information. This is an organization system, not a way to extend a product’s stated storage life.
Match the label to the surface and cleaning routine
Before ordering a large set, test one label on the intended surface. Check the adhesive’s application and removal directions and whether the container manufacturer permits it. Keep labels away from surfaces that contact food unless the product is specifically intended for that use.
Do not assume that every printable label is waterproof or that a waterproof label tolerates dishwasher heat. Compare the instructions for the exact label, ink or tape, and container. A removable label may suit changing contents; a durable label may suit a stable bin category.
Keep the text readable from where you stand
Choose strong contrast and a simple type style. Test a label at the distance you normally view the shelf. A narrow script font may look attractive close up but be difficult to read in a lower cupboard or on a high shelf.
Put labels in a consistent position without covering information you still need. If several people use the pantry, let them try the wording before making the final set. A useful system should work for the person putting groceries away as well as the person who designed it.
Start with the least complicated tool
Handwritten labels may be enough for a small trial. A label maker becomes useful when you regularly update categories and want consistent text. Compare tape width, refill compatibility, power requirements and any app requirements before choosing a machine.
Keep a few blanks or the correct refill available, and update the label when the contents change. Review the system after the next grocery shop. If an item repeatedly lands outside its category, change the category or location instead of adding another label.
Compare the options
These affiliate links open Amazon search results, not individual tested-product recommendations. Compare the exact model, seller, dimensions and compatibility before ordering.
Source and further reading
Related guides

Cold Brew Concentrate vs Ready-to-Drink Coffee
Understand cold brew concentrate, choose a starting dilution, and find measuring and storage tools that suit your coffee routine.
As an Amazon Associate I earn from qualifying purchases. This article contains affiliate links; we may earn a commission if you buy through them, at no extra cost to you.
Featured stock photograph by Perry Merrity II / Unsplash. Illustrative image; pictured items are not identified as linked products.
The difference is the serving strength
Cold brew concentrate is intended to be diluted before drinking, while ready-to-drink cold brew is prepared to be served at its stated strength. Check the label or brewer instructions before using the two interchangeably. The words “cold brew” alone do not tell you how much water or milk to add.
For a purchased product, start with the preparation directions on that exact package. For a home brewer, use its instructions for making and diluting the concentrate. This guide explains how to compare those directions; it is not a taste test of the products in the shopping links.
Read the ratio in the right order
A ratio written as one part concentrate to two parts water means three parts total. For example, 1/4 cup concentrate plus 1/2 cup water makes 3/4 cup before ice or other additions. Keep the concentrate and dilution liquid in the order used by the instructions.
OXO suggests one part concentrate to two or three parts water or milk for its Compact Cold Brew Coffee Maker. That is guidance for that brewer’s concentrate, not a universal rule for every bottle or homemade recipe. Other products may call for a different dilution.
Count milk as part of the dilution
If the directions allow milk, decide how much of the dilution liquid you want it to replace. For a 1:2 starting ratio, 1/4 cup concentrate with 1/4 cup water and 1/4 cup milk still uses two parts added liquid. It will taste different from using water alone.
Taste before adding syrup, especially when using sweetened milk alternatives. Measure a small serving first instead of changing the entire batch. Write down the combination you like so the next glass is easy to repeat.
Account for ice without guessing
Ice can change the drink as it melts. Begin with chilled ingredients and enough room in the glass to stir comfortably. Compare a small test serving before adding more concentrate. If the drink tastes weak at the end, adjust one part of the method next time rather than changing the brewer, beans and ratio together.
Use the storage and refrigeration directions supplied with the coffee and any milk you add. A generic coffee guide cannot establish a safe shelf life for an unknown recipe or product. Keep preparation instructions available when transferring anything to a different container.
Buy tools that make the routine repeatable
A clearly marked measuring jug is useful when you want to reproduce a ratio. Check that its smallest markings suit the quantities you make. A storage bottle can help with pouring, but compare its usable capacity, cleaning access and suitability for the intended beverage.
You do not need a new brewer to learn whether you prefer a lighter or milkier drink. Try the product you already have, follow its directions and change one variable at a time. Buy a brewer only when you know the capacity, filtration and cleanup routine you need.
Compare the options
These affiliate links open Amazon search results, not individual tested-product recommendations. Compare the exact model, seller, dimensions and compatibility before ordering.
Source and further reading
Related guides

Pack a Camera Bag for a Short Shoot Without Overpacking
Build a repeatable camera-bag checklist around the shots you need, with clear places for small accessories.
As an Amazon Associate I earn from qualifying purchases. This article contains affiliate links; we may earn a commission if you buy through them, at no extra cost to you.
Featured stock photograph: camera equipment in a bag / Unsplash. Illustrates the topic; pictured items are not identified as linked products.
Start with a shot list and a time limit
A short shoot can become harder when every accessory comes along. Before opening the bag, write down what you need to capture and how long you expect to work. A talking-head clip, a product demonstration and a property walk-through call for different equipment.
Choose the camera or phone, lens if needed, audio and support that serve those shots. Keep optional equipment on a separate list. If an item does not support a planned shot or a sensible backup, consider leaving it out of the main bag.
Fit the equipment you own
Measure the usable interior of a bag and compare it with the equipment in its travel configuration. Include caps, cases and any attachment you plan to leave fitted. Manufacturer capacity examples are helpful starting points, but your combination may differ.
Adjust dividers so items are supported without being squeezed. Check the maker’s instructions for the bag and equipment. Think Tank’s product information, linked below, shows how a padded insert can be used to organize gear within a compatible larger bag; it is an example to research, not a claim that any insert fits any backpack.
Separate power, audio and small parts
Give each small accessory a predictable place. One pouch for compatible cables and one for audio accessories can be easier to check than a pile of loose items. Label similar-looking connectors and test the complete connection before leaving.
Protect batteries and contacts according to the equipment manufacturer’s instructions. Inspect cables for damage and avoid packing them where heavy items will crush them. If you will fly, check current airline and transport requirements for batteries before travel rather than relying on a general packing list.
Choose a clear card and file routine
Check that recording media is compatible with the device and suitable for the settings you intend to use. Confirm backups before changing or formatting a card. A simple distinction between ready and used media can reduce confusion during a busy session.
For phone shoots, check available storage and battery charge before packing. Keep the shot list accessible without unpacking the camera. Include the small essentials you already use, such as a lens cloth, while keeping cleaning materials appropriate to the equipment.
Reset the bag after the shoot
Back up the files using your normal process, account for every item and note what you actually used. Recharge equipment as directed and return the bag to a ready state. Keep client information and media secure while traveling and storing equipment.
Use a few shoots to discover the real gap before buying a bigger bag. A better divider arrangement or a labeled pouch may solve the problem. The aim is to arrive with the equipment needed for the work and leave with all of it accounted for.
Compare the options
These are Amazon search links, not individual product reviews. We have not tested every item in the results. Check the exact dimensions, compatibility, seller, care instructions and return terms before choosing.
Manufacturer references

Make a Small Linen Closet Easier to Use
Organize towels and bedding by destination, then choose storage that fits your shelves and real laundry habits.
As an Amazon Associate I earn from qualifying purchases. This article contains affiliate links; we may earn a commission if you buy through them, at no extra cost to you.
Featured stock photograph by Florencia Simonini / Unsplash. Illustrates the topic; pictured items are not identified as linked products.
Decide what belongs in this closet
A linen closet works best when you know what each shelf is meant to hold. Start by separating bedding, bath towels, guest items and anything that has drifted in from another room. Group the items by where they will be used.
Decide on a realistic amount for your household rather than copying a standard number of sets. Consider laundry frequency, visitors and the storage available. Put worn or unused items aside for an appropriate next use, donation or disposal so they do not hide the things you reach for every week.
Match the shelf to the item
Measure each shelf’s usable width, depth and height. Include the space needed to reach in and lift a stack out. A container that fits tightly on paper may still be difficult to remove when full.
Place frequently used items where they are easy for the intended person to reach. Keep heavier containers in a practical lower position. Follow the shelving manufacturer’s load limits and mounting instructions; do not add a heavy bin just because there is empty space.
Keep complete bedding sets together
Group sheets and matching pillowcases by bed size or room. You can fold a set together or place it in a suitable breathable fabric bag. Choose the method your family can repeat without a complicated folding routine.
Label the destination clearly. “Guest queen” or “kids’ twin” may help more than a decorative category. If several sets look alike, include the size on the label so you do not have to unfold the whole stack to identify it.
Contain only the stacks that need help
Shelf dividers can help prevent piles from leaning into one another, but compare their mounting style and shelf-thickness requirements. Baskets can gather smaller items, provided the handles and opening work with your shelf depth.
Do not buy a full set of bins before trying one compartment. Some towels are easier to retrieve from an open shelf. Store textiles clean and fully dry, and follow their care directions. Avoid packing so tightly that you cannot return an item without removing everything beside it.
Make the return trip simple
Leave a little room for clean laundry to come back. Put the most-used stack at the front and keep occasional supplies together. A small shelf map or a few consistent labels can help everyone return things to the same place.
After the next laundry cycle, check what became untidy. If one pile keeps falling, reduce its height or change the compartment. If a basket is always left outside the closet, it may be difficult to lift or reach. Let the daily handling guide your purchases rather than treating storage as a one-time makeover.
Compare the options
These are Amazon search links, not individual product reviews. We have not tested every item in the results. Check the exact dimensions, compatibility, seller, care instructions and return terms before choosing.
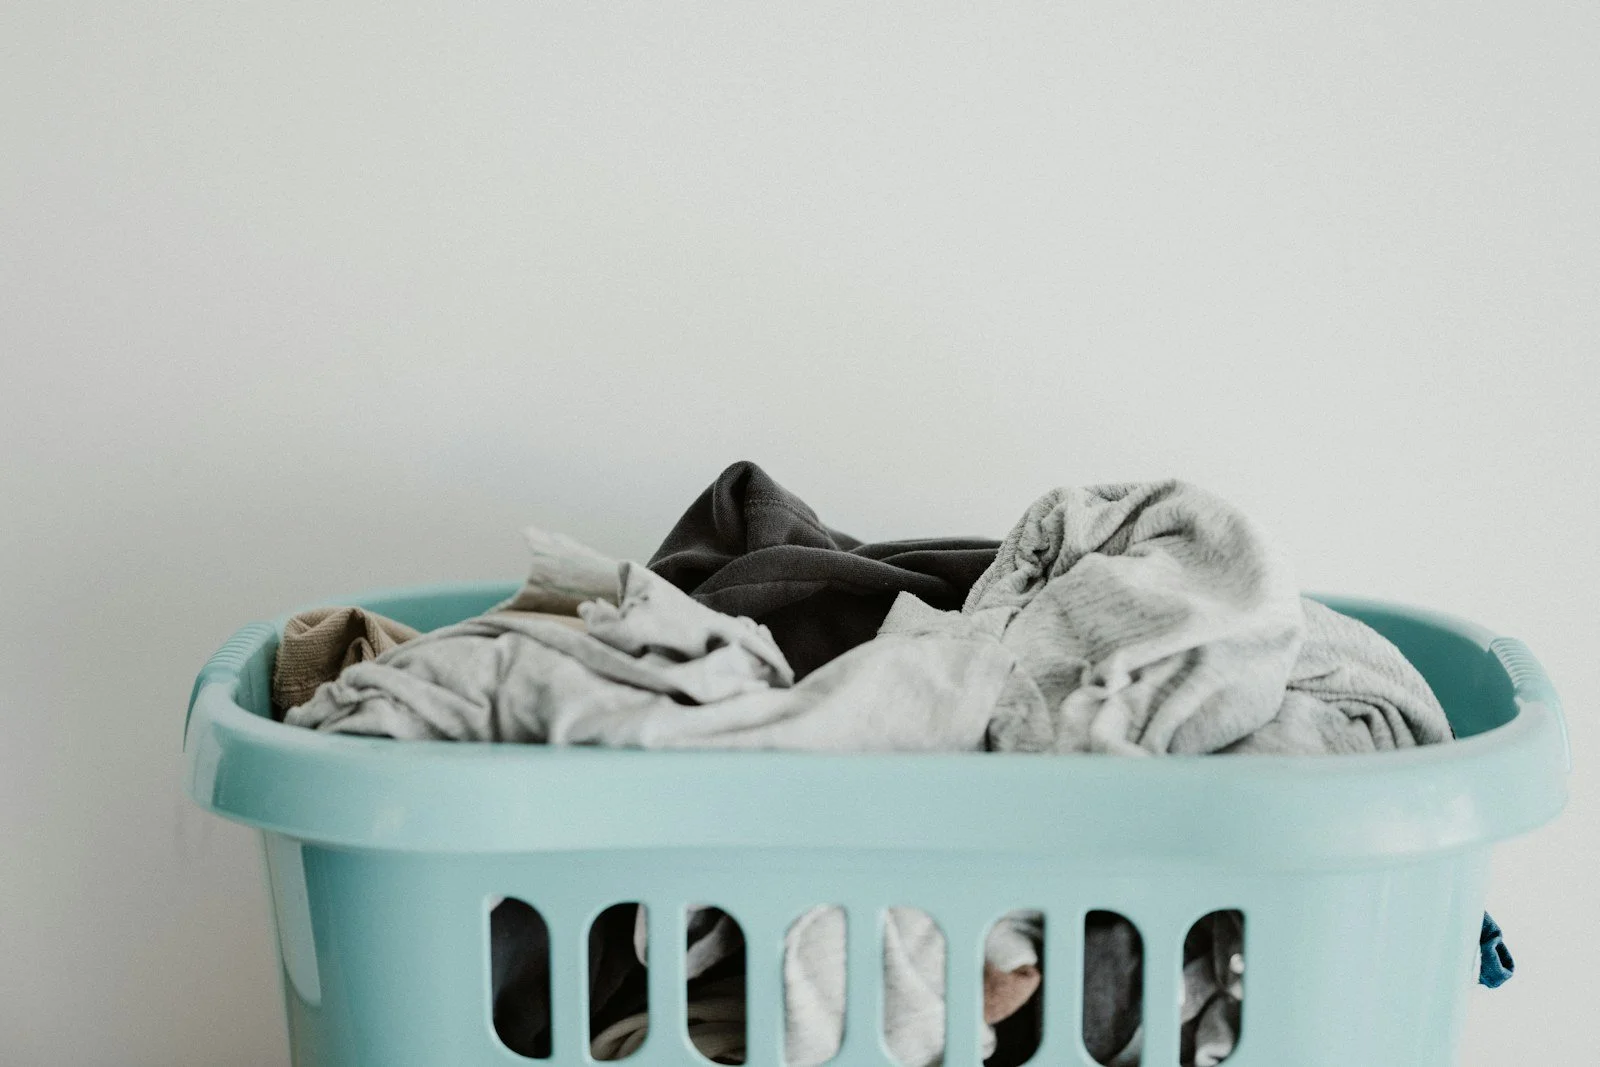
Set Up a Small Laundry Station That Is Easy to Reset
Plan a laundry station around sorting, carrying and putting clothes away before buying storage.
As an Amazon Associate I earn from qualifying purchases. This article contains affiliate links; we may earn a commission if you buy through them, at no extra cost to you.
Featured stock photograph by Annie Spratt / Unsplash. Illustrates the topic; pictured items are not identified as linked products.
Follow the clothes through the house
A laundry station is more than the space beside the washing machine. Clothes need somewhere to wait, a way to reach the machine and a route back to their owners. Notice which step creates the biggest pile before you buy another basket.
If clean clothing stays on the sofa, extra sorting hampers may not solve the problem. If laundry gets mixed in several rooms, one obvious collection point might help. Start with one change that makes the next action easier for the people who actually do it.
Measure for access as well as storage
Measure the usable floor space, shelves and door openings. Allow appliances to open fully, and follow their installation instructions for clearance and ventilation. Keep the route to the machines clear enough to carry a basket comfortably.
A tall storage unit may offer more space, but it still needs safe mounting and access. Check the manufacturer’s installation guidance and your wall type. Avoid placing loose storage where it can interfere with controls, cords, hoses or appliance operation.
Choose sorting that matches your washing
Use categories that reflect the loads you actually run, following garment care labels. A household that needs a small delicates bag and one main hamper may not benefit from a large multi-bin sorter. Keep labels easy to understand so everyone can use the system.
Check the capacity of the bag or basket and how you will lift it. Removable bags can help with carrying, but compare the handle construction and cleaning directions. Do not assume a fabric liner can go in the washing machine unless its label says so.
Give clean clothes an exit route
Leave one clear surface or portable basket for the clean load you are handling now. Return it to an empty state after putting clothes away. If clothing is shared between several rooms, sorting it by destination can reduce repeated trips.
A folding drying rack can be useful when care labels call for air drying. Measure both its open footprint and its storage size. Check the intended load and place it where it will remain stable without blocking a doorway.
Keep supplies contained and appropriate
Store laundry products in their original packaging and according to their labels, away from children and pets. Do not move detergents into decorative food-style containers. A tidy appearance should not make products harder to identify or use correctly.
Try the arrangement for a week with the baskets you own. Then buy the item that removes a clear obstacle: a comfortable carrying basket, a correctly sized hamper or a rack that folds away. A station succeeds when the last clean load gets put away, not when every container matches.
Compare the options
These are Amazon search links, not individual product reviews. We have not tested every item in the results. Check the exact dimensions, compatibility, seller, care instructions and return terms before choosing.

How to Choose a Travel Coffee Mug for Your Daily Routine
Check the lid, cleaning instructions and cup-holder fit before choosing a travel coffee mug.
As an Amazon Associate I earn from qualifying purchases. This article contains affiliate links; we may earn a commission if you buy through them, at no extra cost to you.
Featured stock photograph by Milos Lopusina / Unsplash. Illustrates the topic; the pictured mug is not identified as a linked product.
Picture the whole journey
A mug for a desk has a different job from one that travels in a bag. Start with where you will carry it, where you will set it down and how you will wash it. List those needs before comparing colors or advertised insulation times.
Measure the narrowest part of your cup holder and the clearance under your brewer. Include the handle and lid when checking fit. A mug that holds the right amount of coffee may still be awkward to fill or carry in the place you intend to use it.
Read the lid description closely
Look for the exact maker’s instructions about carrying the mug upright, locking the lid and assembling seals. “Splash-resistant” and “leak-proof” should not be treated as interchangeable promises. Even a product described as leak-proof may require a particular closure procedure.
If the mug will go in a workbag, confirm that the manufacturer permits that use for the exact model. Keep it away from documents and electronics until you understand its operation. Do not assume that a lid from another size or generation will fit.
Check what washing involves
Look at how many pieces the lid contains and whether each drinking surface can be reached for cleaning. A mug that requires careful disassembly may be a poor match for someone who wants a very short cleanup routine. Check whether replacement parts are sold for that model.
Follow the manual’s cleaning and drying directions for the body, seals and lid separately. Zojirushi’s FAQ, linked below, directs owners to the individual instruction manual for care details. That is a useful reminder to compare the actual model instead of relying on broad brand assumptions.
Choose a size you can use comfortably
Fill your regular mug with water and measure the amount you actually drink. Leave room for the fill limit and for any milk you normally add. Consider the weight of the container when full and whether the grip is comfortable for you.
Hot drinks need careful handling regardless of the container. Follow the maker’s guidance about filling, opening and drinking. Check restrictions on what can go inside; a coffee mug should not automatically be assumed suitable for carbonated drinks or other uses.
Buy the smallest useful setup
A bottle brush may help if it fits the opening and is suitable for the interior finish. A small cleaning brush for the lid can be useful only if the instructions permit it. You may already have the tools required.
Compare lid operation, fit and cleaning before treating insulation claims as the deciding factor. Keep the manual and model number somewhere easy to find. The best choice for your routine is the one you can fill, carry, drink from and clean consistently.
Compare the options
These are Amazon search links, not individual product reviews. We have not tested every item in the results. Check the exact dimensions, compatibility, seller, care instructions and return terms before choosing.
Manufacturer references
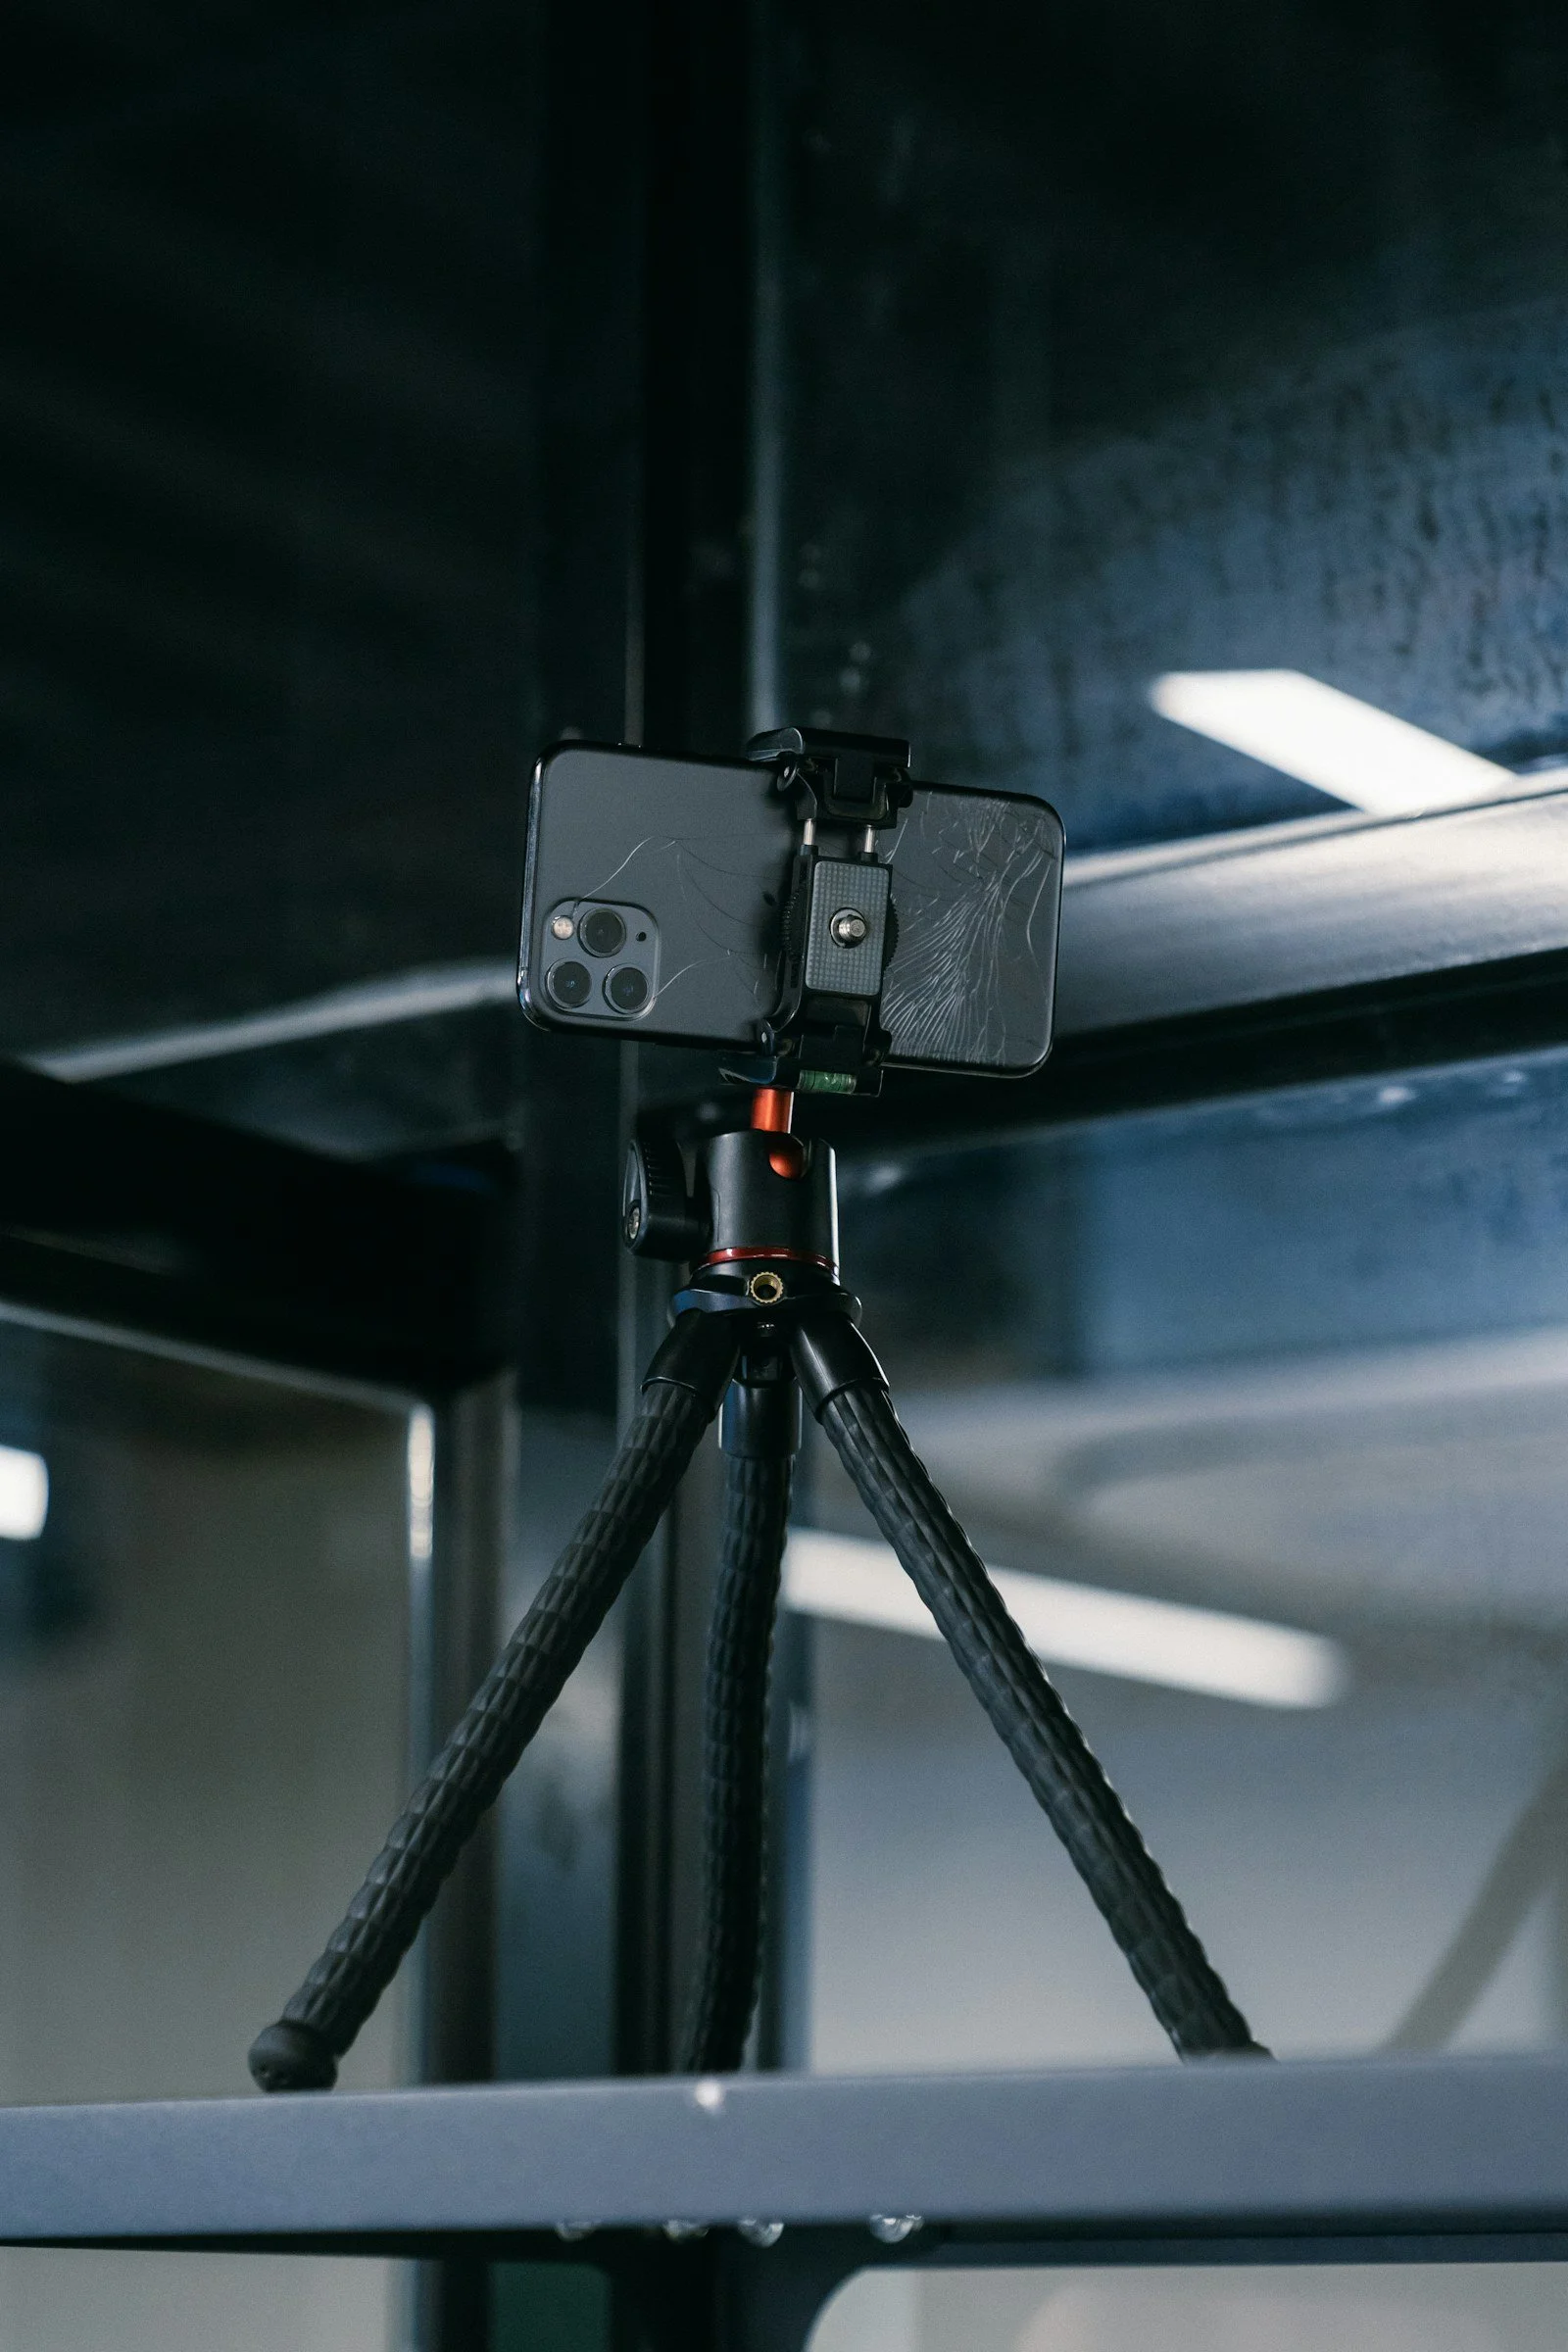
Take Clearer Product Photos With Your Phone
A repeatable window-light setup for small-business product photos, with simple checks before buying equipment.
As an Amazon Associate I earn from qualifying purchases. This article contains affiliate links; we may earn a commission if you buy through them, at no extra cost to you.
Decide what the photograph needs to explain
Before setting up the phone, identify the question the image should answer. A main product photo shows the overall shape. A detail photo can show texture, a closure or a connector. A context photo helps viewers understand scale or use.
Write a short shot list so every image has a purpose. For a handmade item, that might mean front, back, one useful detail and a view beside a familiar object. Represent the actual item accurately and avoid including accessories that could confuse customers about what is included.
Start with a clean, simple surface
Choose a background that makes the edges of the product easy to see. A sheet of plain paper or a clean table can be enough for a test. Remove unrelated objects and check for reflections before deciding whether you need a dedicated backdrop.
Leave space around the item for different crops. Online shops and social platforms use different image shapes, so keep important details away from the edges. Check the current requirements of the destination before making a final export.
Try window light from the side
Place the setup near a window and take a test with the light coming from one side. Move the product or phone until the important details are visible. Avoid mixing several strongly different light sources when they make the colors difficult to judge.
A plain white card on the darker side can reflect some light back toward the object. Move it gradually and compare test frames. Shiny items may reflect the phone, room and photographer, so change the angle before adding more equipment.
Keep the phone position repeatable
Clean the lens and support the phone securely. Use the camera's focus and exposure controls to check the product before shooting. Avoid relying on heavy filters to rescue a poorly lit photograph; customers need a useful impression of the item's color and condition.
A phone clamp and tripod can help repeat the framing for several products. Check the clamp dimensions with your phone case on, the tripod's height and the intended load. Keep the support stable and follow its instructions.
Review the images as a customer would
Look at the photos on a larger screen when possible. Check whether the whole item is sharp enough for its purpose, the background is distracting, and the images explain the details on your shot list. Reshoot the weak frame while the setup is still available.
Save the originals and make separate copies for cropping and adjustments. Keep edits consistent and avoid altering the product in a misleading way. Buy a light, backdrop or support only after a test shows what is limiting the result. A repeatable routine is more useful than a shelf of unused accessories.
Browse the options
These links open Amazon search results, not individual product recommendations or hands-on reviews. Compare dimensions, materials, seller details and compatibility before buying.
Organize a Kitchen Drawer Around What You Use
Measure your drawer, sort everyday tools and choose dividers that leave room to reach what you need.
As an Amazon Associate I earn from qualifying purchases. This article contains affiliate links; we may earn a commission if you buy through them, at no extra cost to you.
Choose one drawer and one job
Start with the drawer that interrupts cooking most often. It might hold everyday utensils, coffee tools or food-storage lids. Take a quick look at what gets tangled or buried before emptying it. That tells you which problem the new arrangement needs to solve.
Work on one drawer at a time so you can finish the reset without spreading the whole kitchen across the counter. Keep sharp objects safely contained as you work. Set aside broken items and follow local disposal guidance for anything hazardous.
Sort by use and frequency
Group tools according to the task they support. Keep everyday items easiest to reach and move occasional equipment to another suitable location. Compare duplicates before deciding how much space each group needs; a family may reasonably use several of one tool and only one of another.
Avoid forcing unrelated objects into the drawer because they happen to fit. Batteries, paperwork and kitchen utensils may need different storage conditions. Follow product instructions and keep small or hazardous items inaccessible to children.
Measure the inside carefully
Measure the usable interior width, depth and height. Allow for any mechanism or drawer shape that reduces the available space. Check that the drawer closes normally with its tallest item inside before purchasing an organizer.
Draw the proposed compartments on paper or mark a layout with temporary boxes. Put the actual tools into the test arrangement. A narrow compartment is no use if you cannot comfortably grasp what it holds.
Choose a tray or adjustable dividers
A fitted tray makes sense for a stable collection of similar items. Adjustable dividers can work better for long or unusually shaped tools. Compare the manufacturer's dimensions, adjustment range and installation requirements with your measurements.
Check how the material should be cleaned and whether it is appropriate for the intended use. If you add a liner, make sure it suits the drawer surface and does not interfere with movement. Do not use a storage organizer as a food-contact surface unless it is intended for that purpose.
Leave room for the reset
Return the everyday tools first. Leave enough space to put each one back without careful stacking. Keep the number of compartments manageable; overly precise arrangements are difficult to maintain when several people use the same kitchen.
Use the drawer for a week before adding more storage. If the same item keeps landing elsewhere, reconsider its location. A useful organizer should make cooking and cleanup easier, not create another system the family has to work around.
Browse the options
These links open Amazon search results, not individual product recommendations or hands-on reviews. Compare dimensions, materials, seller details and compatibility before buying.
Build a Reusable Family Packing Checklist
A practical packing routine with separate lists, a final essentials check and fewer duplicate purchases.
As an Amazon Associate I earn from qualifying purchases. This article contains affiliate links; we may earn a commission if you buy through them, at no extra cost to you.
Begin with the trip, not a shopping list
Before opening a suitcase, write down the trip length, planned activities, expected laundry access and the luggage space available. Check the forecast close to departure. A weekend with relatives and a week of outdoor activities need different packing lists.
Keep a reusable master list, then copy it for each trip. Remove items that do not apply. A list is useful when it helps you make choices, rather than encouraging you to pack everything you have ever needed.
Divide the list into three parts
Create a short personal list for each traveler, one shared-household list and one final-departure list. Personal lists can include clothing and toiletries. Shared items might include a charger or travel laundry bag, so several people do not pack the same bulky item.
Use the final list for things still in use on departure morning: glasses, the usual charging cable and the bag waiting by the door. Handle medications according to their instructions and your travel requirements; keep important documents and personal essentials accessible and secure.
Pack by use rather than appearance
Lay out clothing before packing. Build combinations around the actual activities, then check what can be worn more than once. Keep a spare outfit accessible when it would help your family during the journey. Each person's needs will differ.
Packing cubes can separate people's clothing or group similar items. They do not create more luggage capacity, so measure the bag's interior and compare the cube dimensions. Try a few existing pouches before buying a large matching set.
Make the small items easy to find
Collect charging equipment in one pouch and label cables when the connectors look similar. Check compatibility with the devices you are taking. Keep liquids contained and follow the current rules for your transport provider and destination.
A separate bag for worn clothing makes unpacking easier. Choose something washable and sized to your luggage. Keep damp items separate and deal with them promptly rather than sealing them away for the rest of the trip.
Finish with a realistic departure check
The night before leaving, compare the packed bags with the lists and identify the few items still missing. Give those items a clear collection point. Check luggage size and weight against your actual carrier's requirements before departure.
After the trip, edit the master list while the experience is fresh. Remove things you repeatedly carried without using, and add the item you had to borrow. Let that record guide future purchases instead of buying another organizer before every trip.
Browse the options
These links open Amazon search results, not individual product recommendations or hands-on reviews. Compare dimensions, materials, seller details and compatibility before buying.
A Simple Entryway Drop Zone for Busy Family Mornings
Create a family landing spot for keys, bags and tomorrow’s essentials—even without a mudroom.
As an Amazon Associate I earn from qualifying purchases. This article contains affiliate links; we may earn a commission if you buy through them, at no extra cost to you.
Follow the route you actually take
A useful entryway starts where the family comes in. If everyone uses the side door, a beautifully arranged basket by the front door will not solve the daily pileup. Watch where keys, shoes, bags and mail land for a few days. Then choose one small area on that route to organize.
Make a list of the objects that need a home, rather than starting with a furniture purchase. A household with school bags needs a different arrangement from one with camera equipment or sports gear. Keep the walking route and door swing clear.
Assign a place to the daily essentials
Choose one shallow container for small items such as keys and sunglasses. Keep adult-only items out of children's reach. Bags need a place that supports their size and weight without falling into the walkway. If you use wall hooks, follow the mounting instructions for your wall and the intended load.
Give each person a simple, recognizable spot. A name label can be more useful than matching baskets. Leave enough room to put things away with one hand; a system that requires opening several lids will be harder to maintain during a hurried arrival.
Separate mail from things leaving the house
Use a small incoming-paper tray for mail that needs attention. Review it regularly so it does not become long-term storage. Keep documents with personal information out of view of visitors and away from the reach of children.
Create a separate outgoing spot for library books, returns and forms. A note beside the item can identify its next destination. Do not mix outgoing objects with everyday keys: the point is to make the next action obvious.
Test the system before buying storage
Try an existing bowl, box or shelf for a week. Notice whether objects fit and whether family members use the arrangement. Measure the usable width and depth before replacing the temporary containers. Check that drawers and nearby doors can still open fully.
A bench only helps if there is room to sit and stand comfortably. Tall furniture should be secured as directed by its manufacturer. Choose pieces for your space and household, with special attention to children and pets.
Reset it for tomorrow
In the evening, move unrelated items back to their rooms, check the outgoing spot and prepare the bags needed the next day. Keep occasional equipment elsewhere so the landing area can handle normal arrivals.
Buy only after the test identifies a specific gap: a tray that contains the mail, a correctly sized basket, or labels that make returning items easier. The best drop zone is one the family can restore without a lengthy organizing session.
Browse the options
These links open Amazon search results, not individual product recommendations or hands-on reviews. Compare dimensions, materials, seller details and compatibility before buying.

A Simple Care Kit for a Seasoned Cast Iron Skillet
Seasoned cast iron care: the simple tools to consider before buying a large cleaning kit.
As an Amazon Associate I earn from qualifying purchases. This article contains affiliate links; we may earn a commission if you buy through them, at no extra cost to you.
First, identify the surface
Seasoned cast iron and enameled cast iron need different care. This guide is for a seasoned iron cooking surface. If your pan has enamel, follow its manufacturer’s enamel instructions instead.
You do not need a large accessory bundle to begin. Start with the care directions for your pan and the tools you already have. The useful kit is the one that helps you clean and dry it consistently.
The basic routine
Lodge’s guidance for seasoned cast iron is to wash, dry thoroughly and apply a light layer of cooking oil. A small amount of soap can be used. Follow the manufacturer’s directions for your particular cookware, and take care when handling a hot pan.
For stuck food, use a suitable brush or scraper rather than immediately reaching for a harsh abrasive. Do not leave seasoned iron soaking or put it in a dishwasher when its instructions advise against it.
Choose one cleaning tool
A pan scraper can help lift stuck food from corners. Lodge sells a pan scraper set; check the manufacturer’s directions and temperature limitations before use. A compatible scrub brush is another option. You may not need both on day one.
Choose tools intended for your pan’s surface. Advice for bare seasoned iron should not automatically be applied to an enamel coating. If the coating or surface is damaged, consult the maker’s guidance.
Keep drying supplies close
Use a suitable cloth or towel and dry the pan thoroughly. Apply only a thin film of an appropriate cooking oil according to the cookware instructions; leaving a heavy coating is unnecessary. Store the pan dry.
A dedicated cloth can be convenient, but it is not a reason to buy a specialized set. Follow laundering and storage directions for oily cloths. Let cookware cool safely before storing it.
Buy only what the routine needs
A practical starting list is one suitable scraper or brush, a drying cloth, and an appropriate oil already in your kitchen. A handle cover may help with handling only within its stated limits; it does not make every hot surface safe to touch.
If you see rust or the seasoning needs repair, follow the manufacturer’s restoration instructions. Routine cleaning and full restoration are different tasks. A new care kit cannot replace the right method for the pan you own.
Browse the options
The Lodge scraper link opens the checked two-pack listing. Other links open Amazon search results. Compare the exact model, seller and suitability before ordering.
Manufacturer references
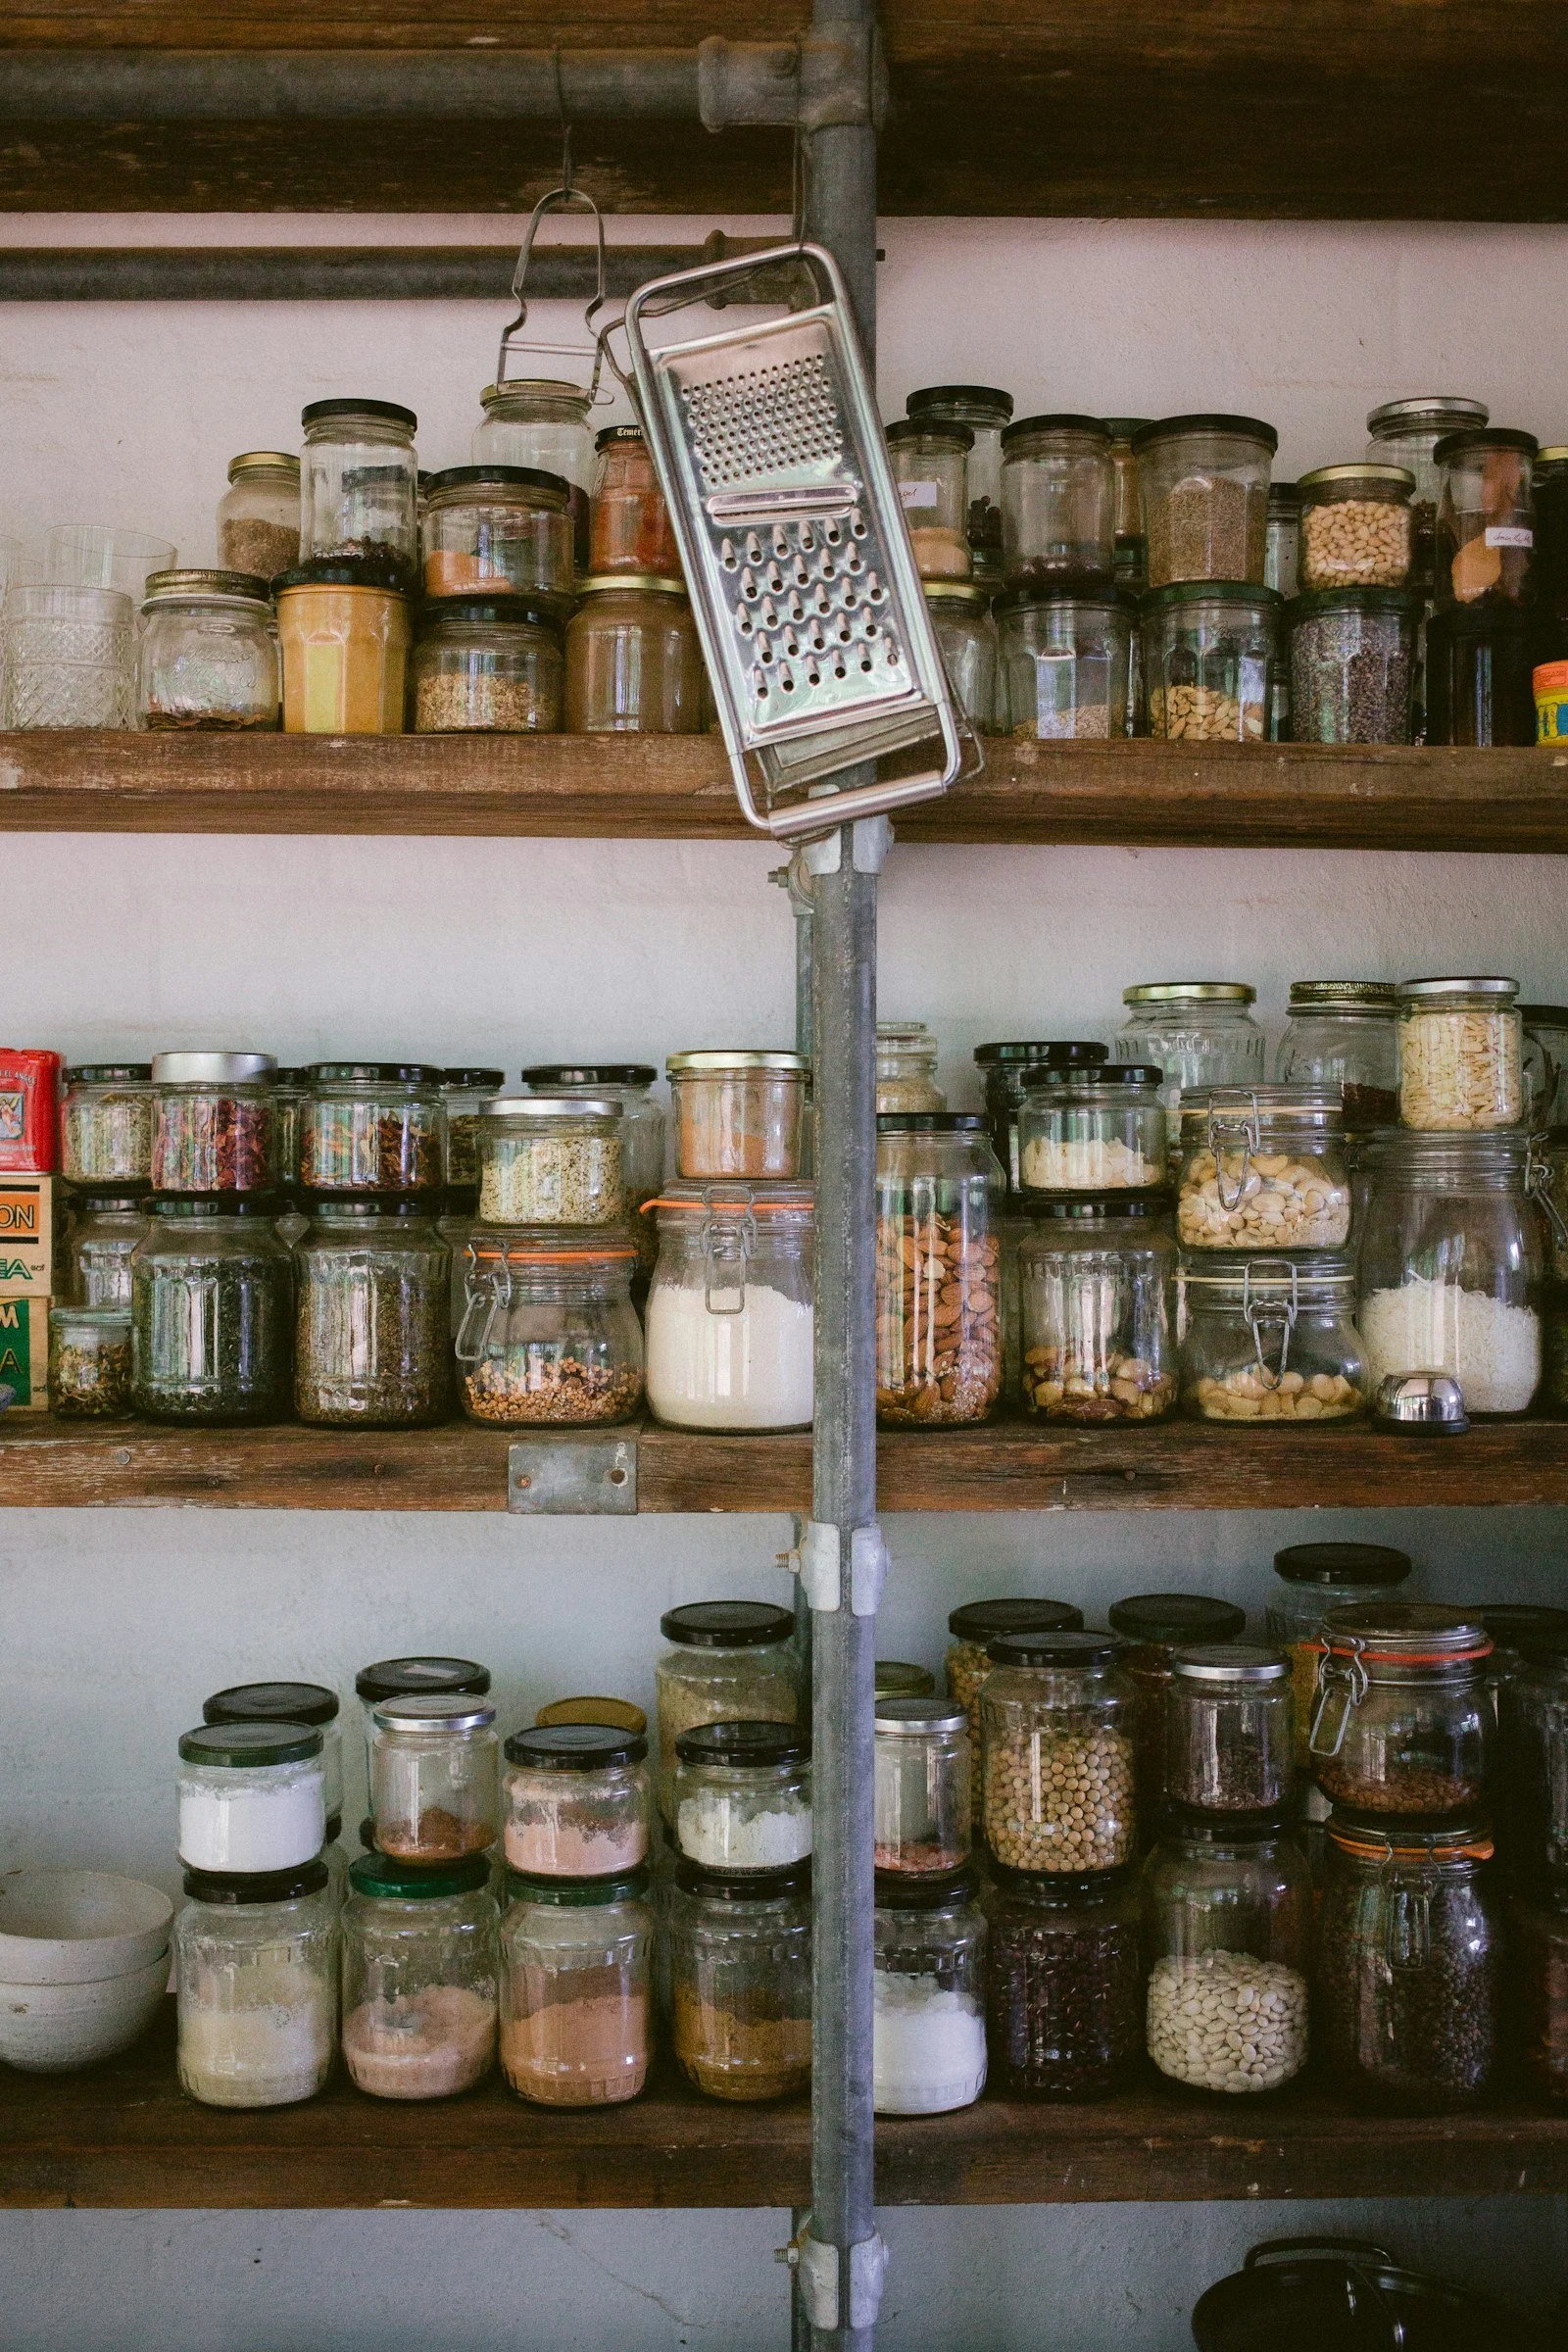
Pantry Organization: Measure First, Buy Fewer Containers
Before you buy pantry containers: shelf measurements, refill sizes and labels that make sense.
As an Amazon Associate I earn from qualifying purchases. This article contains affiliate links; we may earn a commission if you buy through them, at no extra cost to you.
Organize the food before the containers
Take one shelf at a time and group the food by how you use it: breakfast, baking, snacks or meal ingredients. Follow the dates and storage directions on the packaging. Set aside anything that belongs somewhere else.
Now look at what remains. A pantry with tall cereal boxes needs different storage from one holding bags of flour. Buying a complete matching set first can leave you with containers that do not fit your shelves or groceries.
Measure the usable shelf
Record shelf width, depth and height. Allow room to lift a lid or remove a bin. Door hinges and shelf supports may reduce the usable opening, especially for wide baskets.
Choose one shelf to test before ordering multiples. A bin that slides easily when empty may be awkward when filled. Consider handles and how far you need to reach, not just the stated capacity.
Decant selectively
Leave food in its packaging when that is simpler. If you transfer it, use a container intended for food storage and the conditions you need. Keep the original storage instructions, ingredient information and best-before details available. Do not assume every clear container is airtight.
Use a container large enough for the amount you normally buy. If each refill leaves half a bag beside it, the new system may take more space than the old one.
Label for the people using the pantry
Plain labels such as rice, baking and lunch snacks can be more useful than an elaborate category system. Removable labels are helpful while you work out the arrangement.
A label maker is optional. Brother’s P-touch range includes home-labeling options, but tape families and widths vary by model. Verify the exact machine and refill compatibility before buying supplies. Handwritten labels are a good way to test categories first.
Leave a little breathing room
Avoid filling every gap. Keep a space for new groceries and a visible area for items to use next. Group backstock so you can check it before shopping.
After a week, ask which items were hard to reach and which labels were unclear. Move things before buying more. Start with a few bins, add food containers only where they solve a specific problem, and let the system reflect the meals your household actually makes.
Browse the options
These links open Amazon search results, not a single verified product recommendation. Compare the exact size, model, seller and compatibility before ordering.
Food storage containers—check dimensions on Amazon (affiliate link)
Brother P-touch home label makers on Amazon (affiliate link)
Manufacturer references
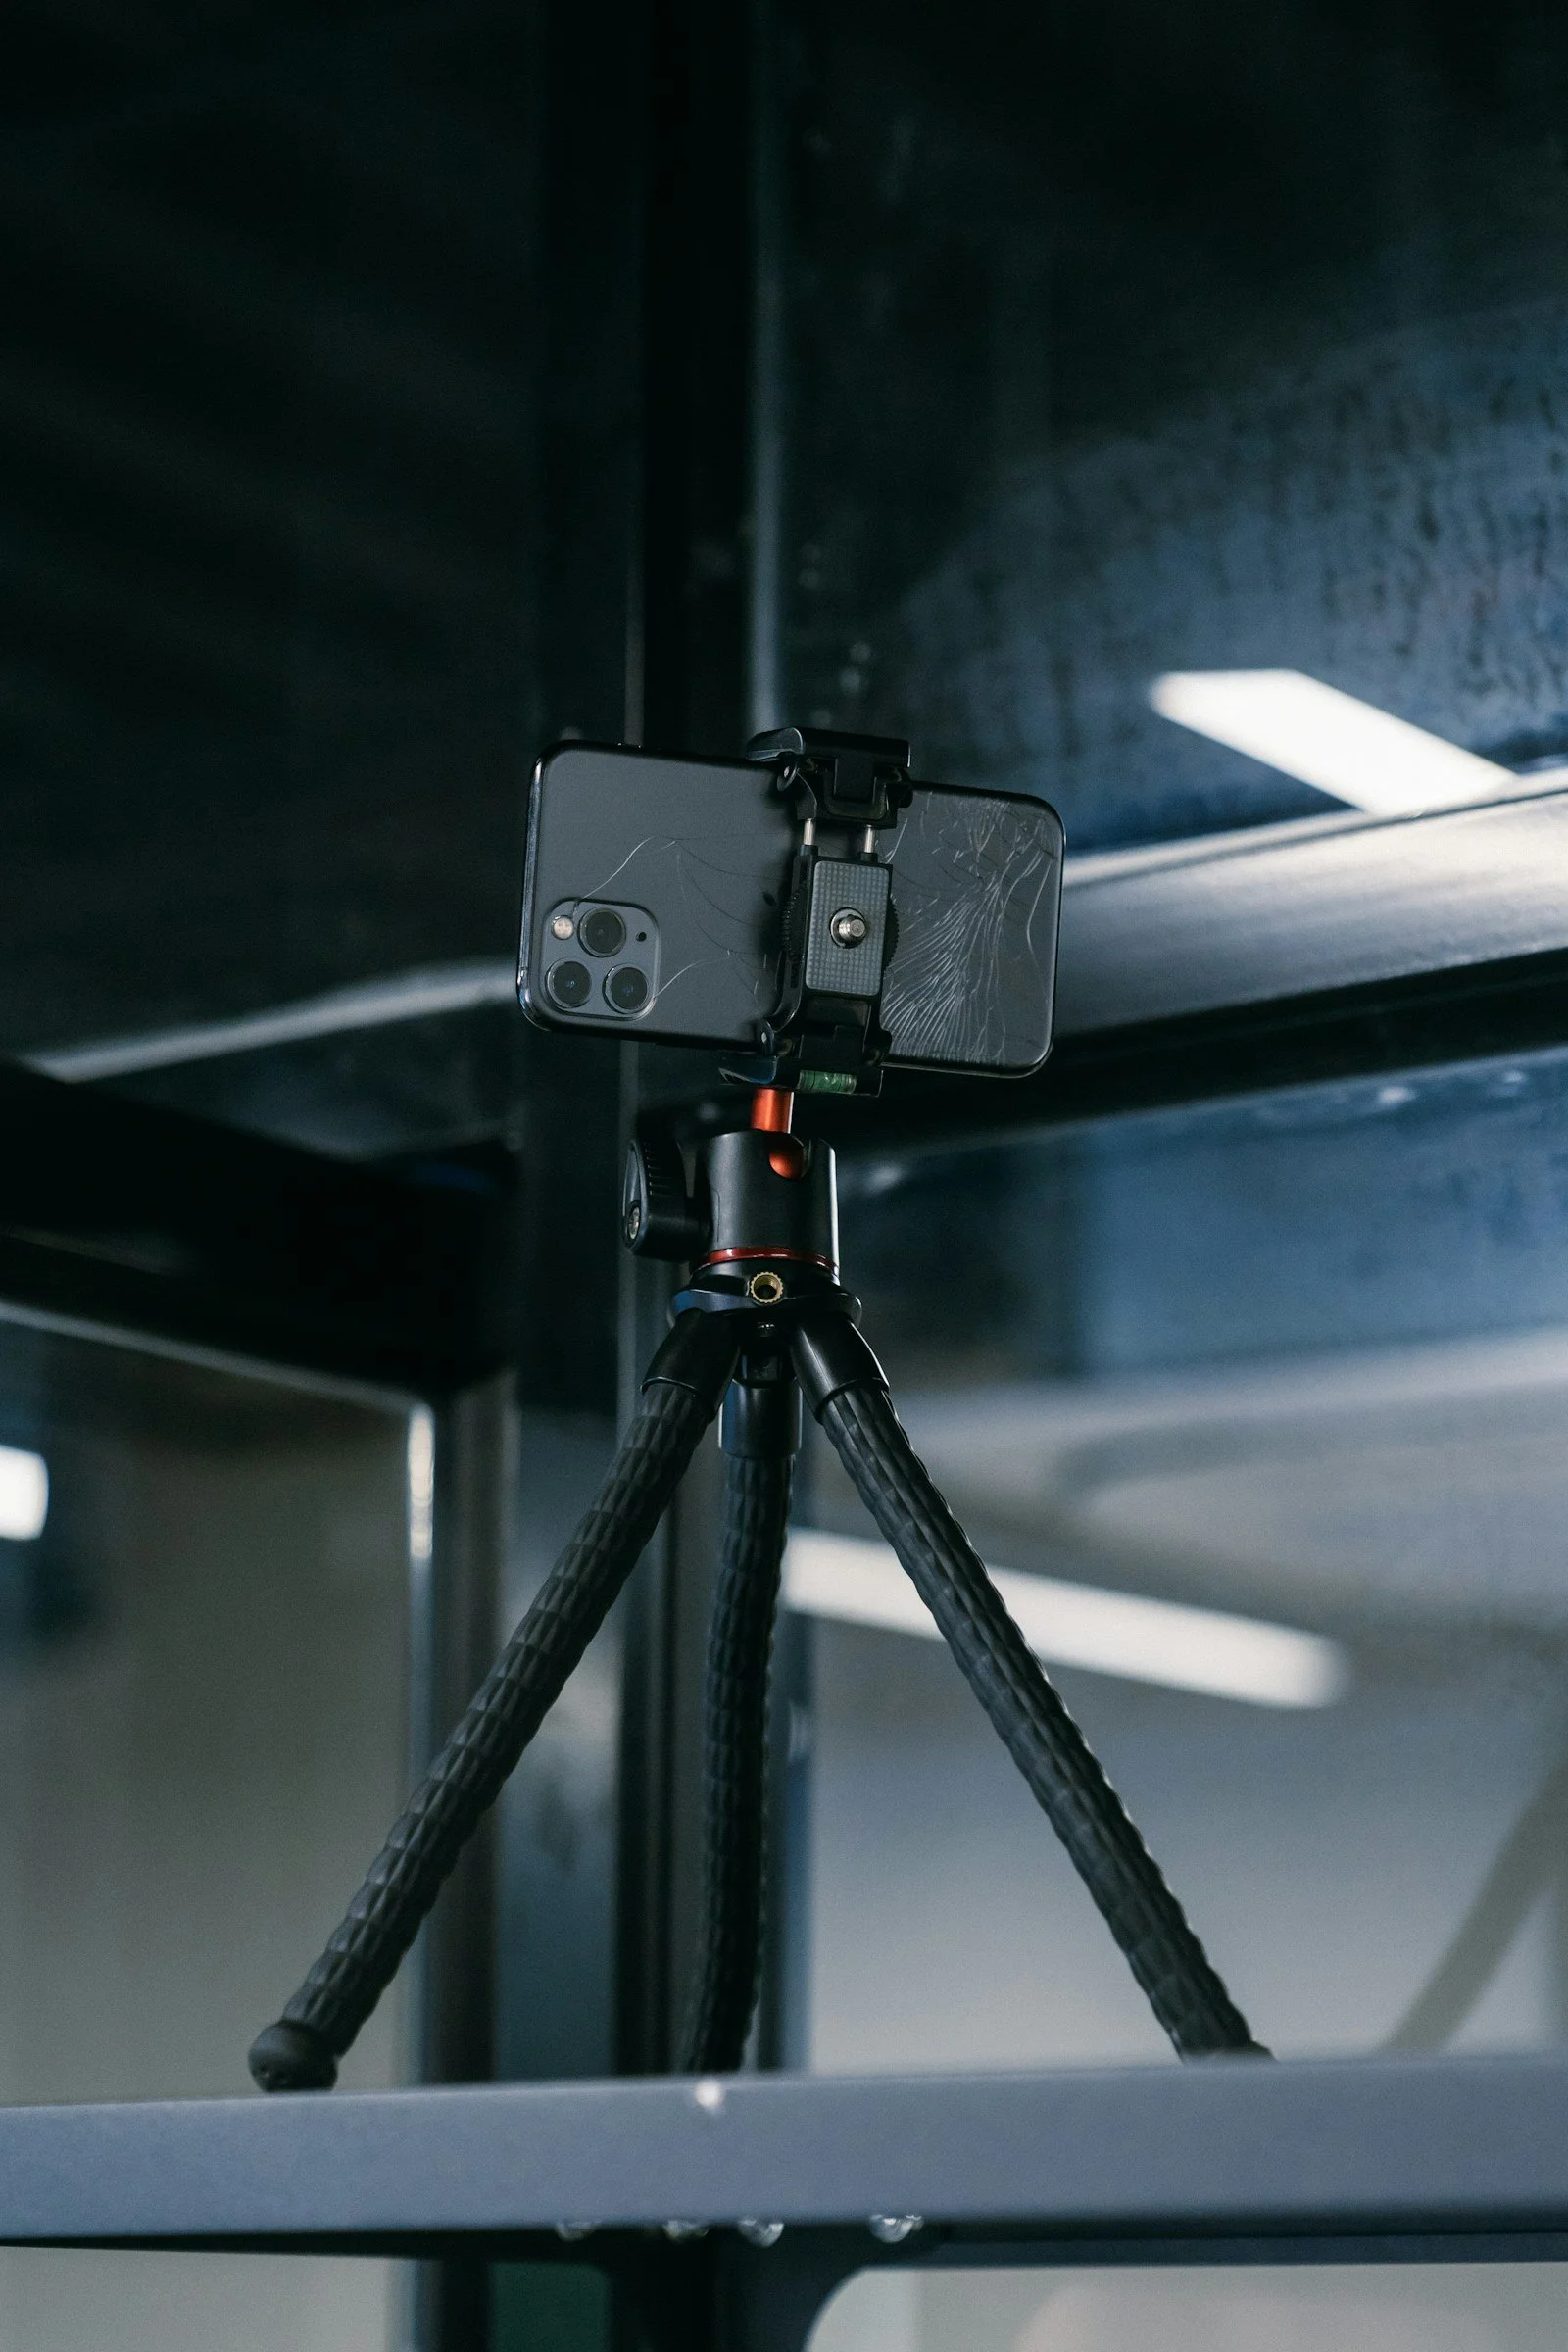
A Simple Phone Video Setup for a Small Business
Small-business phone videos: three checks before buying a tripod, microphone or light.
As an Amazon Associate I earn from qualifying purchases. This article contains affiliate links; we may earn a commission if you buy through them, at no extra cost to you.
Record a test before buying gear
A phone can be a useful starting point for product demonstrations, introductions and short updates. Record a short test in the place you expect to film. Watch it once for framing, once for light, and once for sound. Choose the weakest part to improve first.
A full kit is unnecessary if a steadier phone position would solve the problem. This guide is a buying checklist, not a hands-on review of the products linked below.
Make the framing repeatable
A tripod with a phone clamp lets you repeat a camera position. Check that the clamp fits your phone with its case, rotates for the orientation you need, and attaches securely to the tripod. Check the height with the legs extended rather than relying on a product photo.
For a tabletop demonstration, confirm that the support is designed for the camera angle and load. Keep the base out of walkways and test stability before placing a phone over a surface.
Use the light you have first
Try facing a window, with the phone between you and the window. If the light changes too much or you film after dark, consider an adjustable video light. Look at mounting, power requirements, brightness controls and available desk space together.
Elgato’s Key Light Neo is one model to research on the manufacturer’s site. A dedicated light is an optional next step, not a requirement for starting. Check the current listing and power requirements for the exact model before buying.
Check audio compatibility carefully
Listen to the test with headphones. If room noise is the issue, move somewhere quieter before changing microphones. If you need a phone microphone, check the actual connector, operating-system support, app compatibility and whether any adapter is included.
A USB-C connector alone does not establish full compatibility. Cases can also prevent a receiver from seating properly. Buy for your exact phone rather than choosing only by a product’s headline.
A repeatable filming routine
Clean the lens, choose a quiet place, make a brief outline, check framing and record a ten-second test. Leave enough storage and battery for the session. Record one clear idea at a time.
Start with support, then address sound or light according to your test. Make a few videos before adding more accessories. The goal is a setup that makes it easier to publish useful content consistently.
Browse the options
These links open Amazon search results, not a single verified product recommendation. Compare the exact size, model, seller and compatibility before ordering.